Repair · Effects
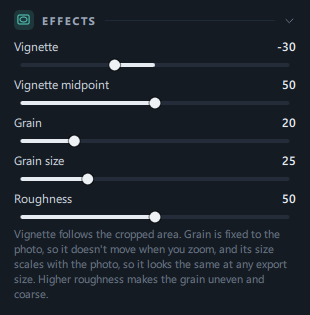
Repair removes dust, blemishes and small spots from a photo with a click. The spot you click is covered with a similar patch from nearby. Effects are finishing touches: Vignette darkens or brightens the corners, and Grain adds film-like grain.
When to use it
- When dust on the lens or sensor shows up as dots in the sky.
- When you want to remove small blemishes on a face, stains on a wall or bits of litter on the ground.
- When you want to remove a short wire across the sky or a small object caught at the edge of the frame (click several times along it).
- When you want to darken the corners slightly to draw the eye to the person in the center — Vignette −.
- When a digital photo looks too clean and you want to add a film-like texture — Grain.
Where to find it
Edit tab → below the LENS CORRECTIONS panel.
- REPAIR panel (bandage icon) — It starts out collapsed, so click the panel title to expand it.
- EFFECTS panel (vignette icon) — Right below REPAIR, and expanded from the start.
Step by step
Remove dust spots from the sky
- Find the dust
Zoom in with the 100% button above the photo and look over the sky carefully. Dust shows up as faint dots that are hard to see in Fit view.
- Expand the REPAIR panel
Click the panel title.
- Adjust Size
Set it so that the circle you see when hovering over the photo is a little bigger than the dust spot.
- Click Repair tool
The button changes to Click on photo · Esc.
- Click the center of the dust spot
After Searching… appears briefly, the spot disappears and the status bar shows "Repair spot added. Undo to revert." Go on and click the next spot.
- Press Esc when you're done
Or click the button again.
- Check the result
Compare before and after with Split view (Y).
Remove small blemishes and stray hairs from a face
- Zoom in to 100% so the blemishes are easy to see.
- Set Size a little bigger than the blemish. If it's too big, the surrounding skin texture changes too.
- Turn on the Repair tool and click the blemishes one at a time. For long things like stray hairs, click several times at short intervals along the hair.
- If a covered spot looks blotchy, click Remove last spot and then click again slightly to the side, or change the size and click again.
- For blemishes and skin texture across the whole face, Remove blemishes · Smooth in Portrait retouching may be easier.
Darken the corners (Vignette)
- Lower Vignette in the EFFECTS panel to −20 to −40. The corners darken and the eye is drawn to the center.
- If the darkened area is too wide, raise Vignette midpoint to 60–80 so it applies only near the corners. If the transition is too obvious, lower the midpoint to spread it out softly.
- If you changed the crop, check again. The vignette is redrawn based on the cropped frame.
Film texture (Grain)
- Raise Grain to 10–30.
- For coarser grain raise Grain size; for a rough, old-film look raise Roughness.
- Zoom in to 100% to check the grain. In the fit view it looks as strong as the exported photo would at the same reduced size.
- It goes well with film or vintage presets (→ Presets).
Result
The dust spots in the sky and the stray hair across the face disappear, and the sky color and brightness in the covered spots blend naturally with their surroundings.
 BeforeAfter
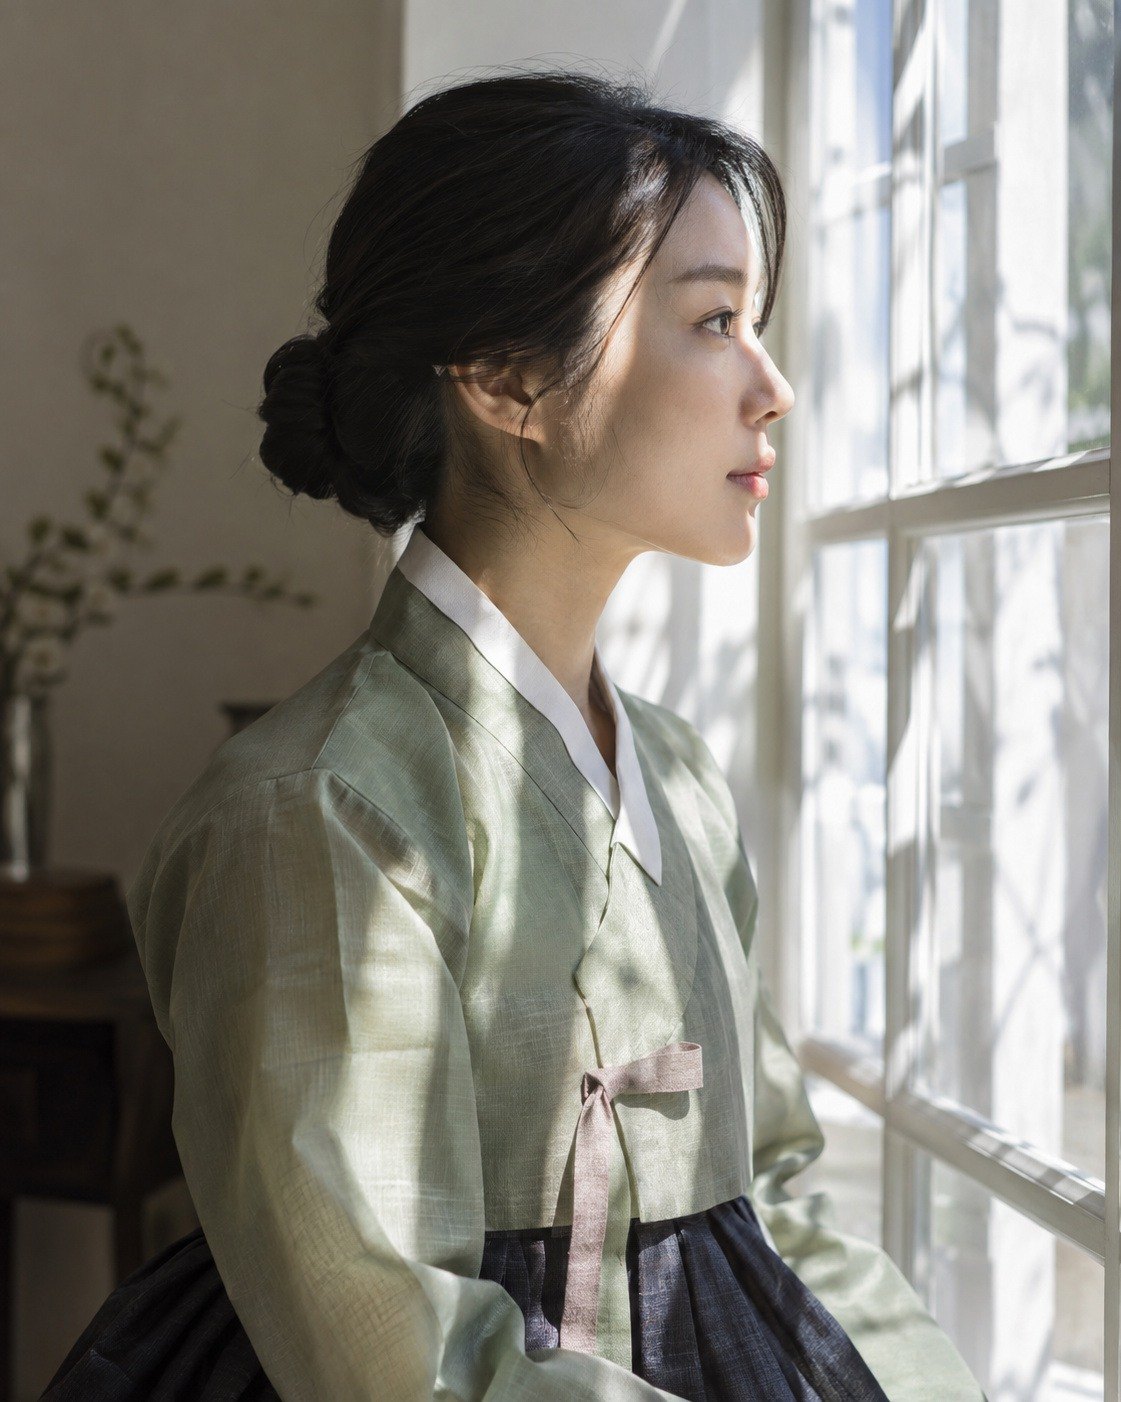
The corners darken subtly, drawing the eye to the profile lit by the window light, while fine grain adds a film-like texture.
The people in the sample photos were generated by AI.
Good to know
Even if you crop or rotate later, the repair spots stay in place, and masks and other edits are applied as if "the spot was never there".
Even areas such as sky, walls and skin are covered cleanly, but right next to complex patterns (text, dense branches) the patch may be noticeable.
The app finds the most similar area around the spot you clicked (within a few circles' distance). If you don't like the result, click Remove last spot and then click slightly to the side, or change the size and click again.
The photo shows only the clean result; check how many spots you've repaired with Repair spots: n in the panel.
Copy edits and presets carry over all your other edits except repairs. Clicking Reset at the bottom of the Edit tab or Reset all at the top also removes repair spots (you can undo this).
clicking the photo removes a spot. To move a zoomed-in photo, turn the tool off with Esc, move the photo, and turn the tool on again.
They're applied even after the Deep Blacks panel, so raising Black depth doesn't make corners darkened by the vignette any deeper.
The grain size is set from the short side of the photo, so it looks the same whether you export a large photo at its original size or smaller.
- Vignette and grain values belong to the "Effects" item in Copy edits and in your own presets (together with the Detail values).
Frequently asked questions
How many spots can I repair?
Up to 64 per photo. Beyond that, the status bar shows "You can add up to 64 repair spots."
The spot I clicked actually looks blotchier.
Undo it with Remove last spot (or Ctrl+Z), then make the size a little bigger or smaller and click again. If it was covered with an area of different texture, also check that Match surrounding light and color is on.
Can I remove something long, like a wire, in one go?
Each click removes one circle. Click several times along the line so the circles overlap.
I clicked, but nothing changed.
The patch is searched for around the spot you clicked (within a few circles' distance). Right next to the edge of the photo with a large circle, there may be no area nearby to copy from, so nothing changes. Click Remove last spot, reduce the size and click again.
Raising Vignette midpoint seems to weaken the vignette.
Raising the midpoint applies it only near the corners, so the darkened area gets smaller. Adjust the strength with the Vignette slider.
I added a vignette and then changed the crop, and its shape changed.
That's because the vignette is drawn based on the cropped frame. We recommend adjusting the vignette after you've finished cropping.