Deep Blacks
Readjusts the blacks as the very last step, after presets, LUTs and curves have all been applied. It pulls blacks that a filter turned gray back down to deep black, and removes teal or brown casts in the dark areas to make clean blacks. Midtones and bright areas are left as they are.
When to use it
- When you applied a preset such as film, cinematic or Japanese mood and the blacks turned gray, so the photo looks hazy.
- When you applied a LUT (look) and hair, dark clothes and shadows turned a dull gray.
- When the blacks won't go any lower even with the Blacks slider of the Light panel all the way down (because that slider is applied before filters; see "Good to know" below).
- When a teal or brown cast in the dark areas keeps the blacks from looking clean.
- When you want to make only the dark areas crisp while leaving the bright areas and skin brightness as they are.
Where to find it
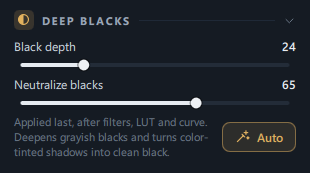
The DEEP BLACKS panel (half-filled circle icon) right below the LIGHT panel, on the Edit tab.
- Masks have the same 2 sliders too. When you select a mask on the Masks tab, Black depth · Neutralize blacks are below, after the divider following Saturation, and they're added only in that area (→ Masks).
- When you click Auto in the top bar, Black depth is also adjusted for photos with lifted blacks (→ Editor overview — Auto).
Step by step
Readjusting blacks after applying a preset (the most common order)
- Choose a preset first
On the Presets tab, click a preset you like (for example "Overcast Film") to apply it. You can see that the blacks have turned gray.
- Go to the Edit tab
Click Edit at the top of the right panel and find the DEEP BLACKS panel below the LIGHT panel.
- Click Auto
It's the Auto button at the bottom right of the panel. Analyzing… is shown for a moment, then the Black depth · Neutralize blacks values are filled in, and the status bar at the bottom shows the values that actually changed, such as "Blacks adjusted (darkest point 18/255 → 2/255, Black depth 24 · Neutralize blacks 64). Undo to revert."
- Refine by eye
If it's too deep, lower Black depth a little; if the color of the shadows is still dull, raise Neutralize blacks.
- Compare before and after
Turn on Split view on the photo (or press Y) and drag the center line to compare before and after.
Adjusting by hand
- Slowly raise Black depth
Raise it until areas that should be black, such as hair, pupils and window frames, become a crisp black. Check that a bright sky, skin and white shirts don't change.
- Raise Neutralize blacks
It works on its own, regardless of black depth. At 100, almost all of the teal or brown in the dark areas is removed. Stop when as much has been removed as you want.
- Check the histogram
When the left end of the RGB histogram at the top of the Edit tab sits against the floor, the blacks have come down.
Applying it to only part of the photo (masks)
- On the Masks tab, create or select a mask (for example a radial mask around a person's head).
- Raise Black depth · Neutralize blacks at the bottom. They're added to the black values of the Edit tab, so only that area gets deeper (the total is capped at 100).
Result
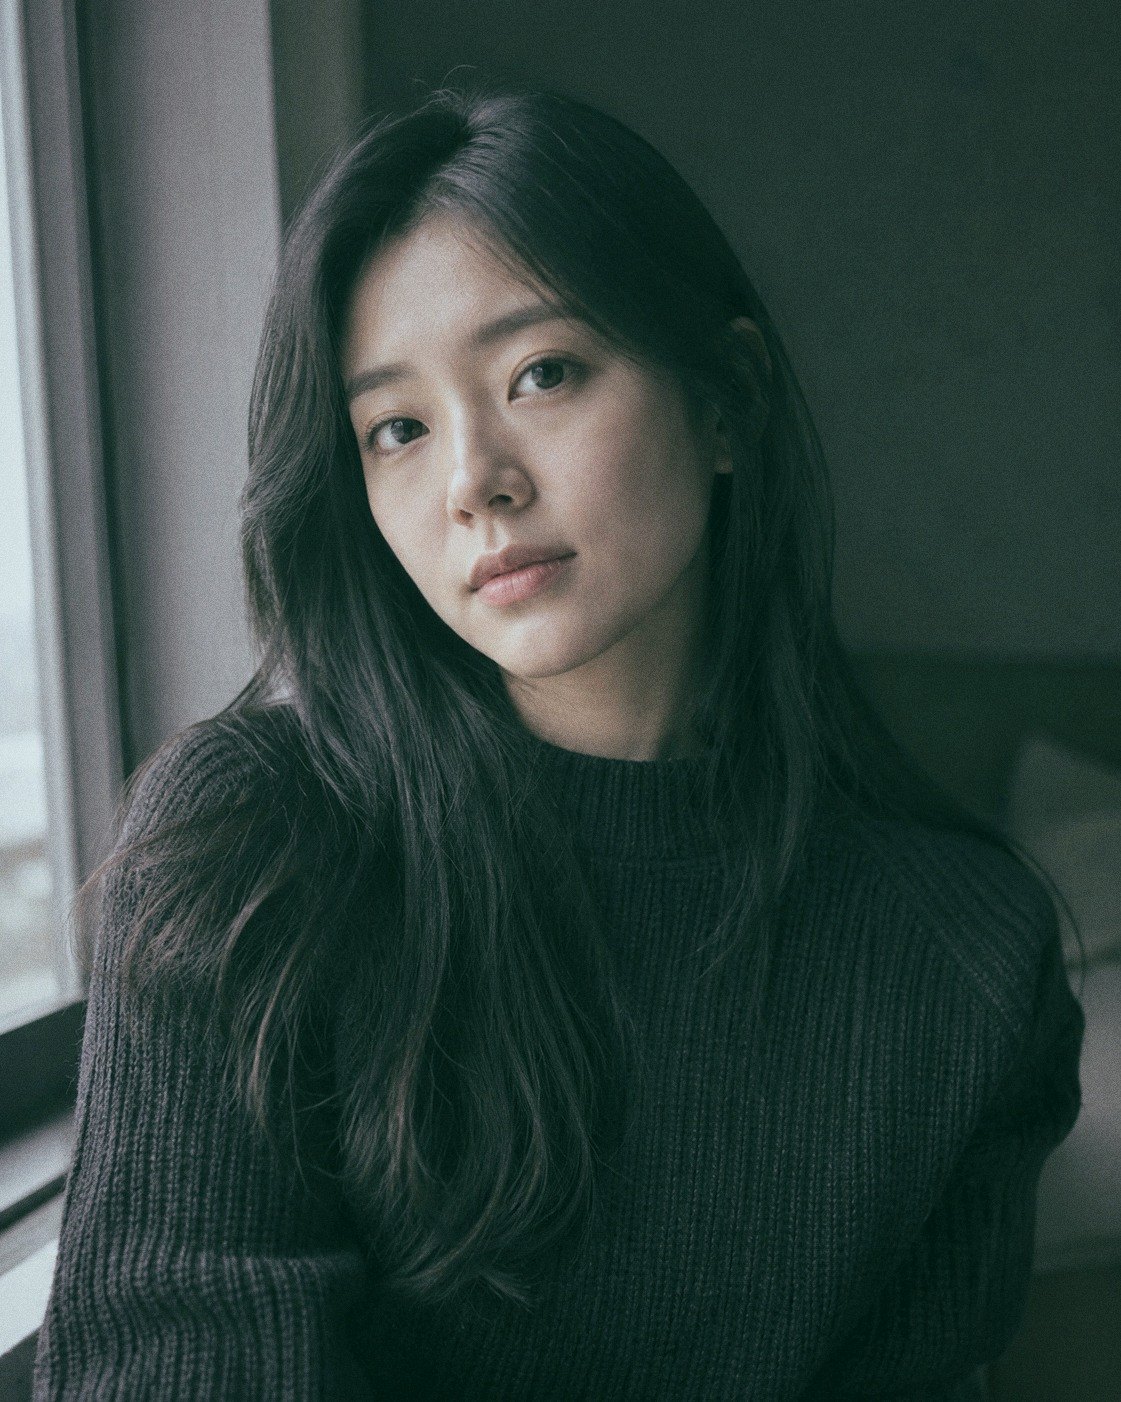
 BeforeAfter
The darkest point goes down from 18/255 to 2/255, so the hair, eyes and dark knit become a crisp black, while the light coming through the window, the skin and the white areas stay as they are. Neutralize blacks at 64 also removed the teal cast in the shadows.
The people in the sample photos were generated by AI.
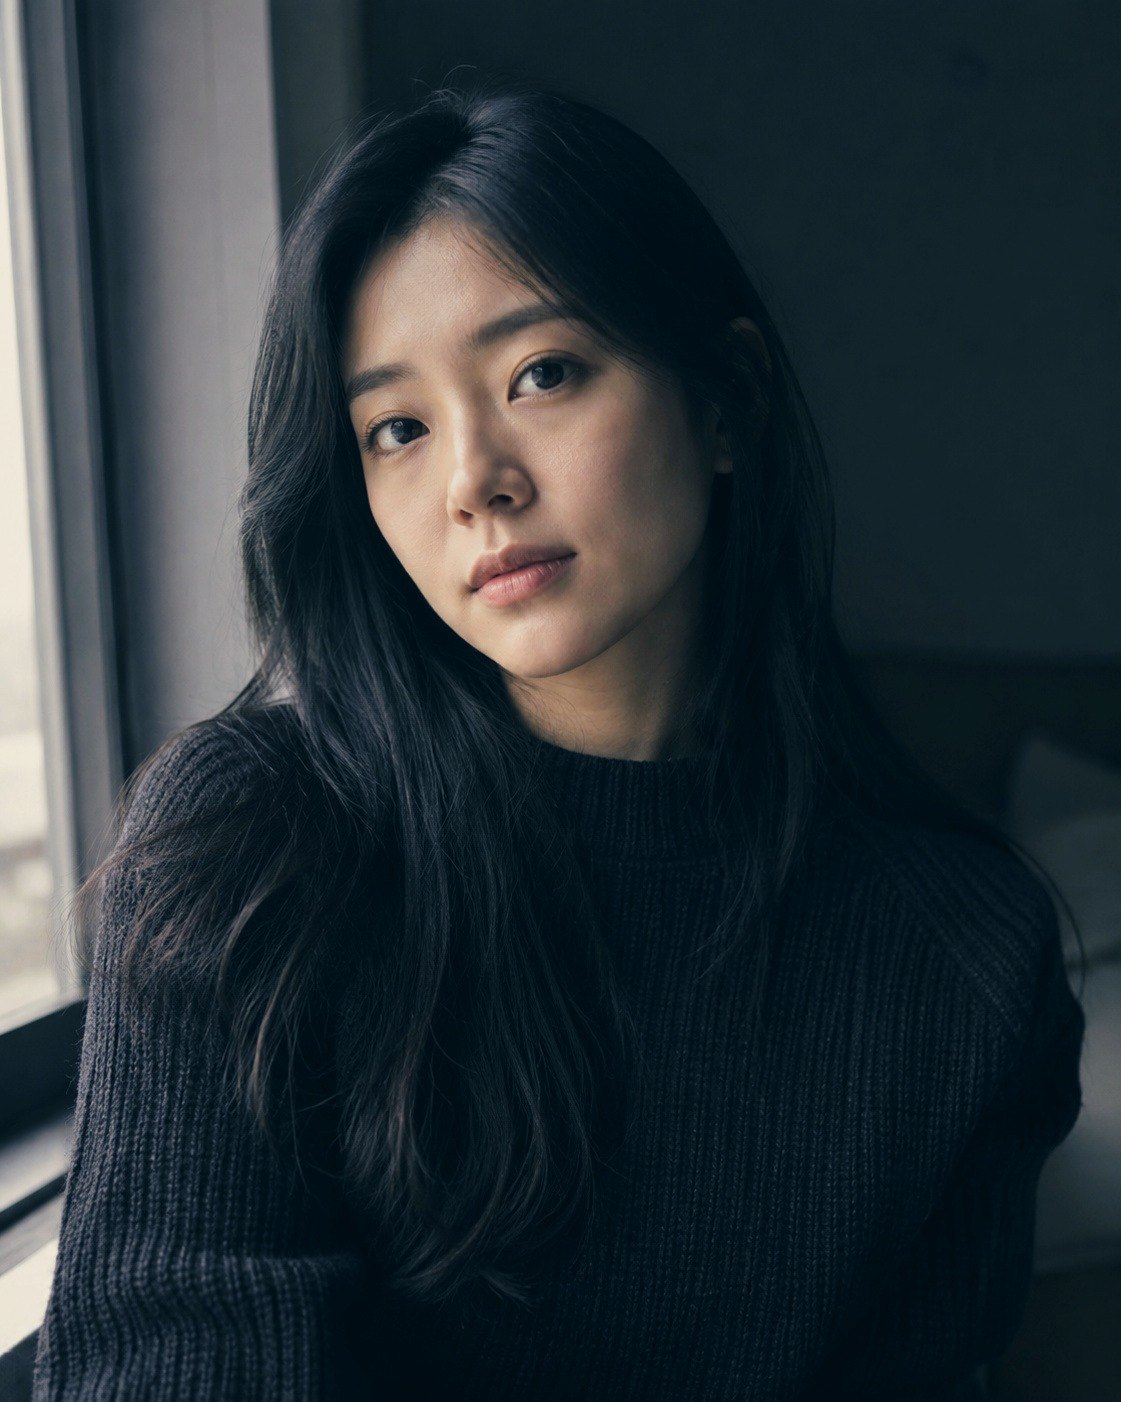
 BeforeAfter
Even with the Cinematic preset applied, the darkest point of this photo was already dark enough at 9/255, so Auto left black depth at 0 and removed only the teal cast in the shadows (neutralize blacks 63). Status bar: "Blacks adjusted (darkest point 9/255 → 9/255, Black depth 0 · Neutralize blacks 63)."
The people in the sample photos were generated by AI.
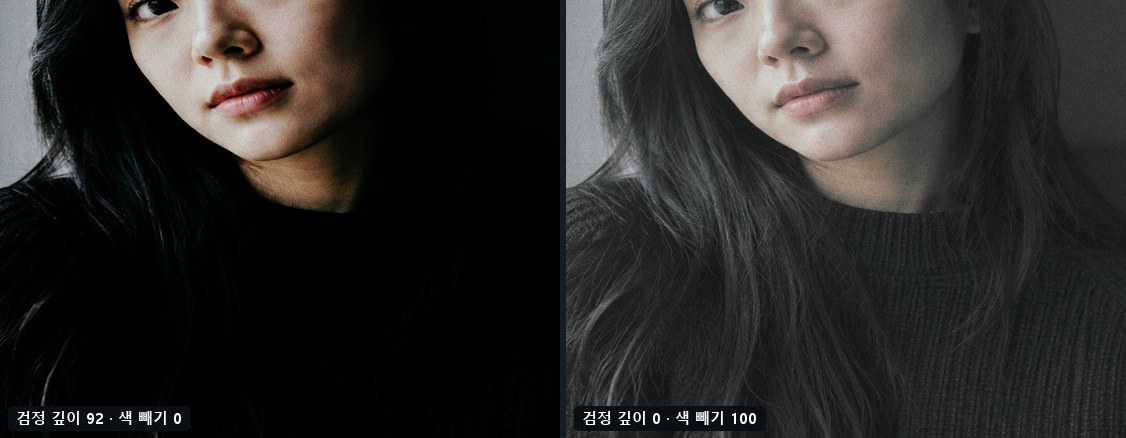
Good to know
Auto in the Deep Blacks panel analyzes "the image as currently shown". Changing the preset, LUT or curves can lift the blacks again, so just click it once more after a change.
The Blacks slider adjusts the dark end before presets, LUTs and curves; the Deep Blacks panel pulls the blacks down again after all of them. For photos without a filter, the Blacks slider alone is enough; for photos with a filter, use the Deep Blacks panel.
"darkest point 18/255 → 2/255" shows where the darkest part of the photo (0.5% of the whole) was on the 0–255 brightness scale and where it moved to. The closer to 0, the blacker.
When you raise black depth, areas brighter than the midtones stay as they are. To darken the whole photo, use Exposure in the Light panel.
So in photos whose dark areas are already neutral (for example with a gray-toned preset), the difference is small. Areas genuinely deep in color, such as lips, clothes and darkly dyed hair, are also deliberately left as they are.
Even if you've entered values yourself, they're replaced with the auto values. If the darkest point is already black enough, black depth is left at 0 and only the color cast in the dark areas is removed. If there's no cast to remove either, it says "Blacks are already dark enough (darkest point N/255). Left unchanged." and keeps the values you entered.
Auto in the top bar adjusts only Black depth along with brightness and contrast. To adjust Neutralize blacks too, click Auto in the Deep Blacks panel. Also, clicking Auto in the top bar again sets black depth anew.
Blacks are applied after presets, LUTs, curves, color grading, masks and detail, right before the vignette and grain of Effects. So corners darkened by a vignette aren't affected by black depth.
- If you move another slider during auto analysis, that auto result is discarded. Wait until Analyzing… is finished.
- Press Ctrl+Z once to go back to before Auto was applied.
Frequently asked questions
How is this different from the Blacks slider of the Light panel?
The Blacks slider is applied before presets, LUTs and curves, so it has no effect if a filter lifts the blacks again afterward. The Deep Blacks panel is applied at the very end, so it can pull down blacks lifted by a filter.
Is it the same as adding a point to the dark side of the curve and pulling it down?
It's similar, but the curve is applied before the LUT, and depending on where you place points, the midtones change too. The Deep Blacks panel adjusts only the dark areas after the LUT and leaves areas brighter than the midtones as they are.
I raised Neutralize blacks to 100 but nothing changed.
It means there's almost no color cast in the dark areas of that photo. Raising Black depth first widens the range neutralize applies to.
Won't lips or red clothes turn gray?
Areas genuinely deep in color are designed to be left alone. Only faint colors, such as slight casts, are removed.
Can I save it as a preset or copy it to other photos?
Yes. The black values are part of the LIGHT group. After Copy edits, choose "Light" in the paste window, or choose "Light" when saving your own preset, and they're included (→ Presets).
Can I apply Auto to several photos at once?
Use Copy edits on the values Auto set for one photo and paste them to several photos (→ Editor overview).