Jump to date · Map
Jump to date lets you pick a year, month and day, such as "August 2019", and go straight to that point in a long list (the list stays as it is; only the viewing position moves). Map shows photos with location data (GPS) as pins; click a pin to view that photo large.
When to use it
- When you want to go straight to around "last Christmas" without scrolling through tens of thousands of photos.
- When you want to go to the start of a period by choosing only a year, or only a year and month.
- When you want to see at a glance when the photos you're looking at were taken (the date button at the top left of the list).
- When you want to check on a map where you took the photos on a trip, and open the photos taken at that spot.
- When you want to check where a single photo was taken on a large map, or open it in another map service.
Where to find it
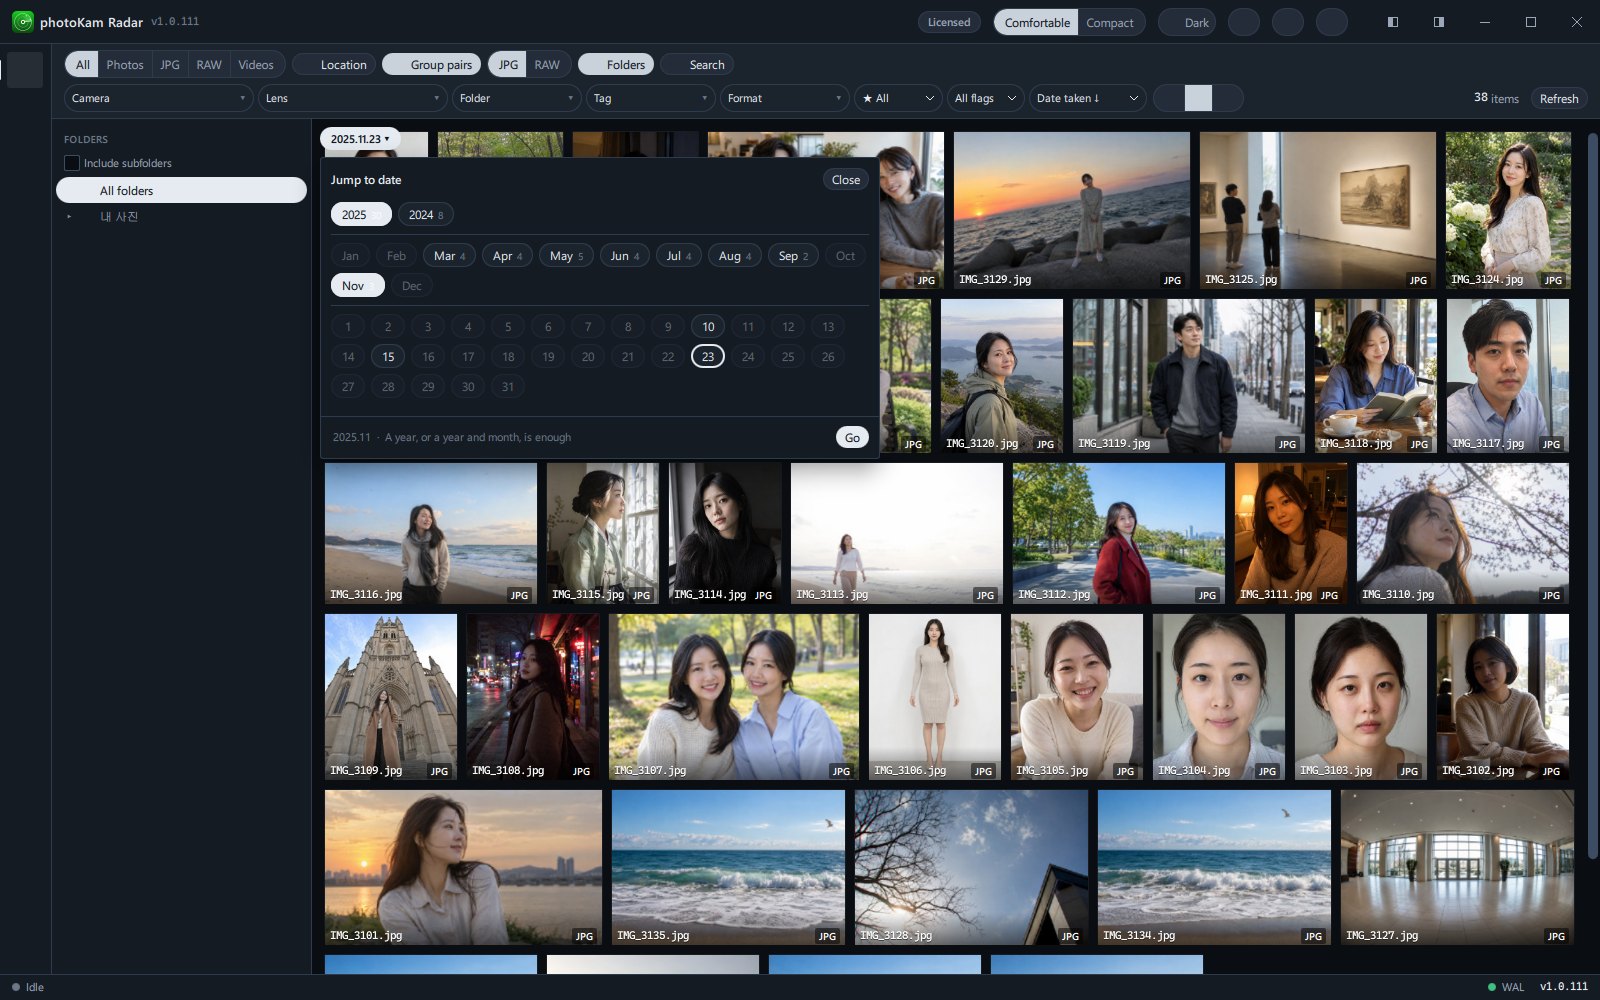
- Date button: the accent-colored button at the top left of the gallery's photo list (for example
2025.12.27 ▾). It shows the date of the photo currently at the top of the screen. Click it to open the Jump to date window. The shortcut is Ctrl+G.
It's shown only when the sort is Date taken ↓ · Date taken ↑. - Map screen: Map in the left sidebar.
- Map window for a single photo: opens when you click Show location in the GPS item of the details, or Expand on the small map in the analysis · information panel of the full view.
Buttons and menus
Jump to date window
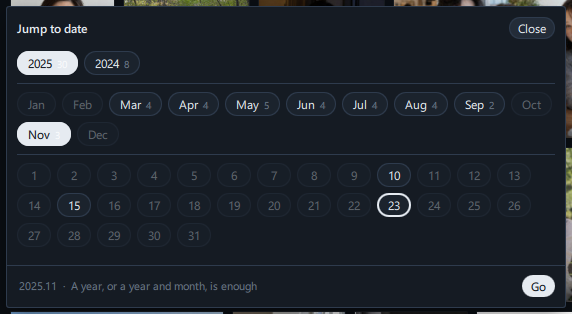
| Name | Appearance · range | Default (when opened) | What it does |
|---|---|---|---|
| Title · Close | Top | — | Closes the window |
| Year buttons | Only years with photos, most recent first. The small number beside each = number of photos that year | The year you're currently viewing is selected | Only selects. Selecting a different year clears the month and day selection |
| Month buttons | Jan – Dec (12). The number beside each = number of photos that month. Only months with photos can be clicked (the rest are dimmed) | The month you're currently viewing is selected | Only selects. Click the selected month again to clear it |
| Day buttons | 1 – 31 (31). Only days with photos can be clicked (the rest are dimmed) | Not selected | Only selects. Click the selected day again to clear it |
| Selected button | Filled with the accent color | — | The year · month · day currently selected |
| Outlined button | Accent-colored border | — | The year · month · day of the photo currently at the top of the screen (shows where you are) |
| Text on the bottom line | For example 2025.12 · A year, or a year and month, is enough | — | The currently selected date and a hint |
| Go | Right of the bottom line | Clickable as soon as the window opens (since a year · month is already selected) | Moves to the start of the narrowest unit you selected (day → month → year) and closes the window |
Even when the list covers a long period and the buttons overflow, the bottom line (Go) is always visible. While photos are being counted, "Counting dates…" is shown; if there are no dates at all, "No dates in this list" is shown.
Map screen
| Name | Location | What it does |
|---|---|---|
Map · N GPS photos | Thin bar at the top | Number of photos with location data (Loading… while loading) |
| Cluster pin (circle with a number) | On the map | A pin grouping nearby photos into one. Number = photo count. Color: green under 10 photos, yellow under 100, orange for more. Click it to zoom in until all the grouped photos are visible |
| Single pin (small blue dot) | On the map | One photo. Hover over it to see the file name as a tooltip; click it to open the photo in the full view |
| + · − | White buttons at the top left | Zoom in · out one step |
| Attribution | Bottom right | Map attribution (click to open the attribution page in your browser) |
- When you first open it, the map automatically fits all pins on one screen.
- One notch of the wheel zooms in · out one step around the mouse position. Double-click to zoom in one step, and drag to move the map.
- Zoom in far enough to see side streets and photos are shown one by one instead of grouped. Even then, photos at exactly the same spot are shown as one pin.
Map window for a single photo
| Name | What it does |
|---|---|
| 📍 Latitude, longitude | The photo's coordinates (to five decimal places) |
| Google Maps | Opens those coordinates in Google Maps in your browser |
| OSM | Opens those coordinates in OpenStreetMap in your browser |
| ✕ | Close (you can also close it by clicking outside the window or pressing Esc) |
| Map | Shows the location as a single blue dot, at a scale where you can see the neighborhood |
| Note at the bottom | "The map is shown when you are connected to the internet." |
Step by step
A. Choosing a year · month · day and jumping to that day
- Open the date window
Click the date button at the top left of the photo list or press Ctrl+G. (If you don't see the button, change the sort to Date taken ↓.)
- Choose a year
Click the year you want to go to (for example
2024). The window stays open, and the months of that year appear below. - Choose a month
Click
Dec. The days of that month appear below. - Choose a day
Click
25.2024.12.25appears on the bottom line. - Go
Click Go (or press Enter). The window closes, the list moves to the first photo of that day, and that photo is selected.
B. Jumping by year only, or by year and month only
- Open the date window. The year and month you're currently viewing are already selected.
- To jump by year only, click the year you want (this clears the month selection), then click Go right away.
- To jump by year and month, click the year → the month in that order, then click Go.
- To clear a selected month or day, click that button once more.
C. Opening trip photos from the map
- Open the map
Click Map in the left sidebar. All pins are shown on one screen.
- Zoom in
Click the cluster pin (circle with a number) at your destination to zoom in to that spot. After a few clicks, blue dots (single photos) appear.
- Check the name
Hover over a blue dot to see the file name.
- View it large
Click a blue dot to open that photo in the full view; the filmstrip at the bottom shows all photos in the same folder as that photo. Flip through them with ← · →.
D. Viewing where a single photo was taken
- In the gallery, click a photo with the location pin (red circle icon).
- In the GPS item of the details on the right, click Show location.
- The map window opens. To view it in another map service, click Google Maps or OSM.
Result
Jump to date is a position feature, not a filter. The photo count (N items) stays the same, and if you scroll up or down you'll see photos from other dates continuing on.
Keyboard shortcuts
| Where | Key | What it does |
|---|---|---|
| Gallery | Ctrl+G | Open · close the Jump to date window |
| Date window | Enter | Go (jump to the selected date) |
| Date window | Esc · click outside | Close |
| Map window | Esc | Close |
Good to know
The photo counts in the date window are based on the current list. If you've filtered by camera, folder and so on, the counts are within that filter, and the jump also happens within it.
"The start of a period" depends on the current sort order. With Date taken ↓ (newest first), the start is the latest photo taken in that period; with Date taken ↑, it's the earliest photo taken.
The map shows all photos with location data, regardless of the gallery's filters. To see only photos with location data in the gallery, turn on Location in the toolbar.
The date button and the date window can be used only when sorted by shooting date.
Photos without a shooting date (screenshots, photos forwarded to you and so on) are placed in the list by their file modification date, and the date window counts them by that date too. If the shooting date is unreliable, such as a date in the future or in 1970, the file date or the indexing date is used instead.
Map images are loaded from the internet, so the background map appears when you're connected (pins are shown either way). Your photos and location data are never sent outside your PC.
In the full view opened by clicking a pin on the map, the filmstrip at the bottom shows all files in that folder, regardless of the gallery's type and Group pairs settings.
Frequently asked questions
When I click a year, the window closes right away.
In the current version, clicking a button only selects it. You move only when you click Go or press Enter after making all your selections. If the window still closes as it used to, update the app to the latest version.
I don't see the date button.
The date button appears when the list is sorted by shooting date and has photos. Change Sort in the toolbar to Date taken ↓.
A month is dimmed and can't be clicked.
It means there are no photos from that month in the current list. It may appear if you clear your filters.
I want to filter by a date range and see only the photos from that period.
Jump to date only moves the viewing position. To keep only the photos from a specific period, use Date taken in the search panel (Search and filters).
My RAW photos don't appear on the map.
Try clicking Jobs → Fill in RAW location data in the left sidebar. It rereads the location data from the RAW files and fills it in ("Filled in location data for N RAW files.").
These are phone photos, but they're not on the map.
Location recording may have been off when you took them, or the location data may have been removed when the photos went through a messenger or an editing app. You can check whether a photo has location data by the GPS item in the details.