Detail
Work with the texture and detail of a photo. Make edges crisper (Sharpening), remove the grain and color blotches caused by shooting at high ISO (Noise reduction · AI denoise), bring out or soften fine texture and mid-sized contrast (Texture · Clarity), and clear away hazy air (Dehaze).
When to use it
- When you shot at a high ISO at night or indoors and see luminance noise or color blotches — Luminance noise and Color noise. For heavy noise, AI denoise.
- When the focus is right but edges look slightly soft — Sharpening.
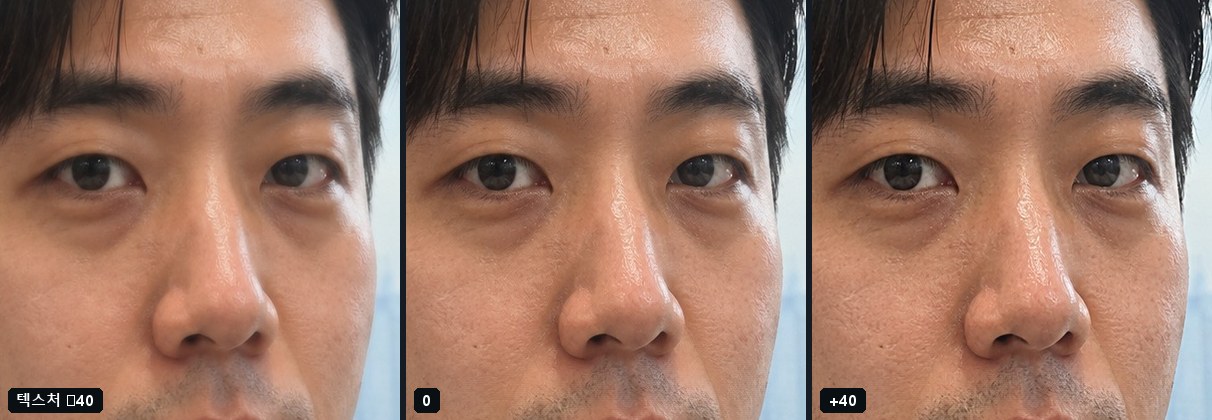
- When you want to bring out the fine texture of hair, fabric or leaves, or, the other way round, smooth something like skin — Texture.
- When you want to give a photo punch (depth), or, the other way round, make it dreamy and soft — Clarity.
- When distant mountains or a city look hazy and faded in a landscape photo — Dehaze.
Where to find it
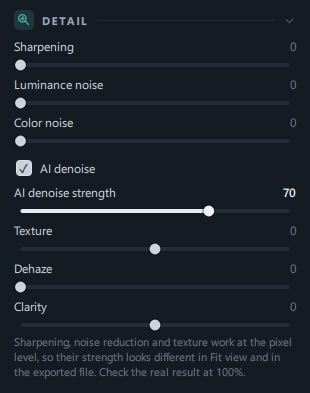
Edit tab → the DETAIL panel below the TONE CURVE panel (magnifier icon). It's expanded from the start.
Step by step
Remove noise from a high-ISO night photo
- View at 100%
Click 100% above the photo and zoom in on a face or a dark area. Noise shows clearly when you zoom in.
- Turn on AI denoise
When you check it, the strength is set to 70. The first time, Running AI denoise… · Applying… appear and it takes a few seconds (depending on your computer's performance).
- Adjust the strength
It looks natural when a little fine texture remains on skin or walls. Changes to the strength are applied right away.
- Remove any remaining color blotches with Color noise
If red or green specks remain in dark areas, set it to 20–40.
- Make up for lost crispness a little with Sharpening
Around 10–30 is about right. Raising it a lot makes the removed noise visible again.
- Return to Fit view and check the whole photo
Click Fit.
A light touch without AI (low ISO, slightly grainy photos)
- Zoom in to 100%.
- To remove color blotches first, set Color noise to 20–40 before anything else.
- Raise Luminance noise just until the noise stops being distracting (10–40). Raising it too far makes skin look like plastic.
- If needed, raise Sharpening a little.
Clear up a hazy landscape
- Raise Dehaze to 20–50. The color and outlines of distant mountains or buildings come back.
- If it gets too intense and dark, raise Exposure or Shadows in the Light panel a little.
- To add more depth, raise Clarity to +10 to +30.
Refine texture in a portrait
- To bring out the texture of hair, eyebrows and fabric, raise Texture to +10 to +20.
- To soften skin a little, lower Texture to −10 to −30 (this applies to the whole photo). To retouch only the face, use the skin features in Portrait retouching or a mask.
Result
 BeforeAfter
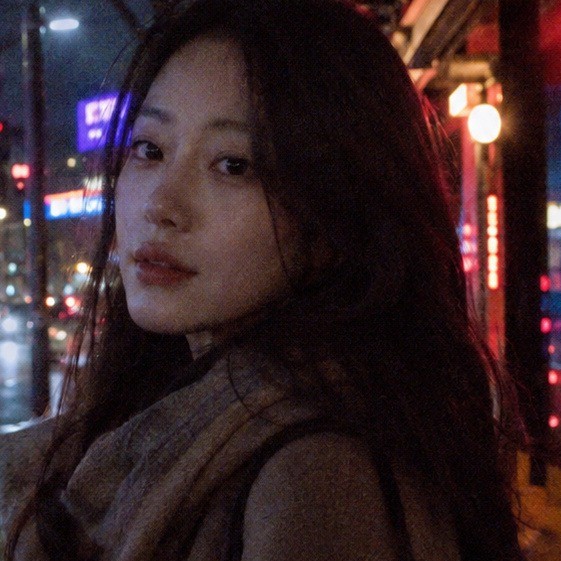
The coarse noise and color blotches on the dark coat and in the background disappear, while the outline of the face and the neon edges stay intact. Only AI denoise was turned on at 70; no other slider was touched.
The people in the sample photos were generated by AI.
 BeforeAfter
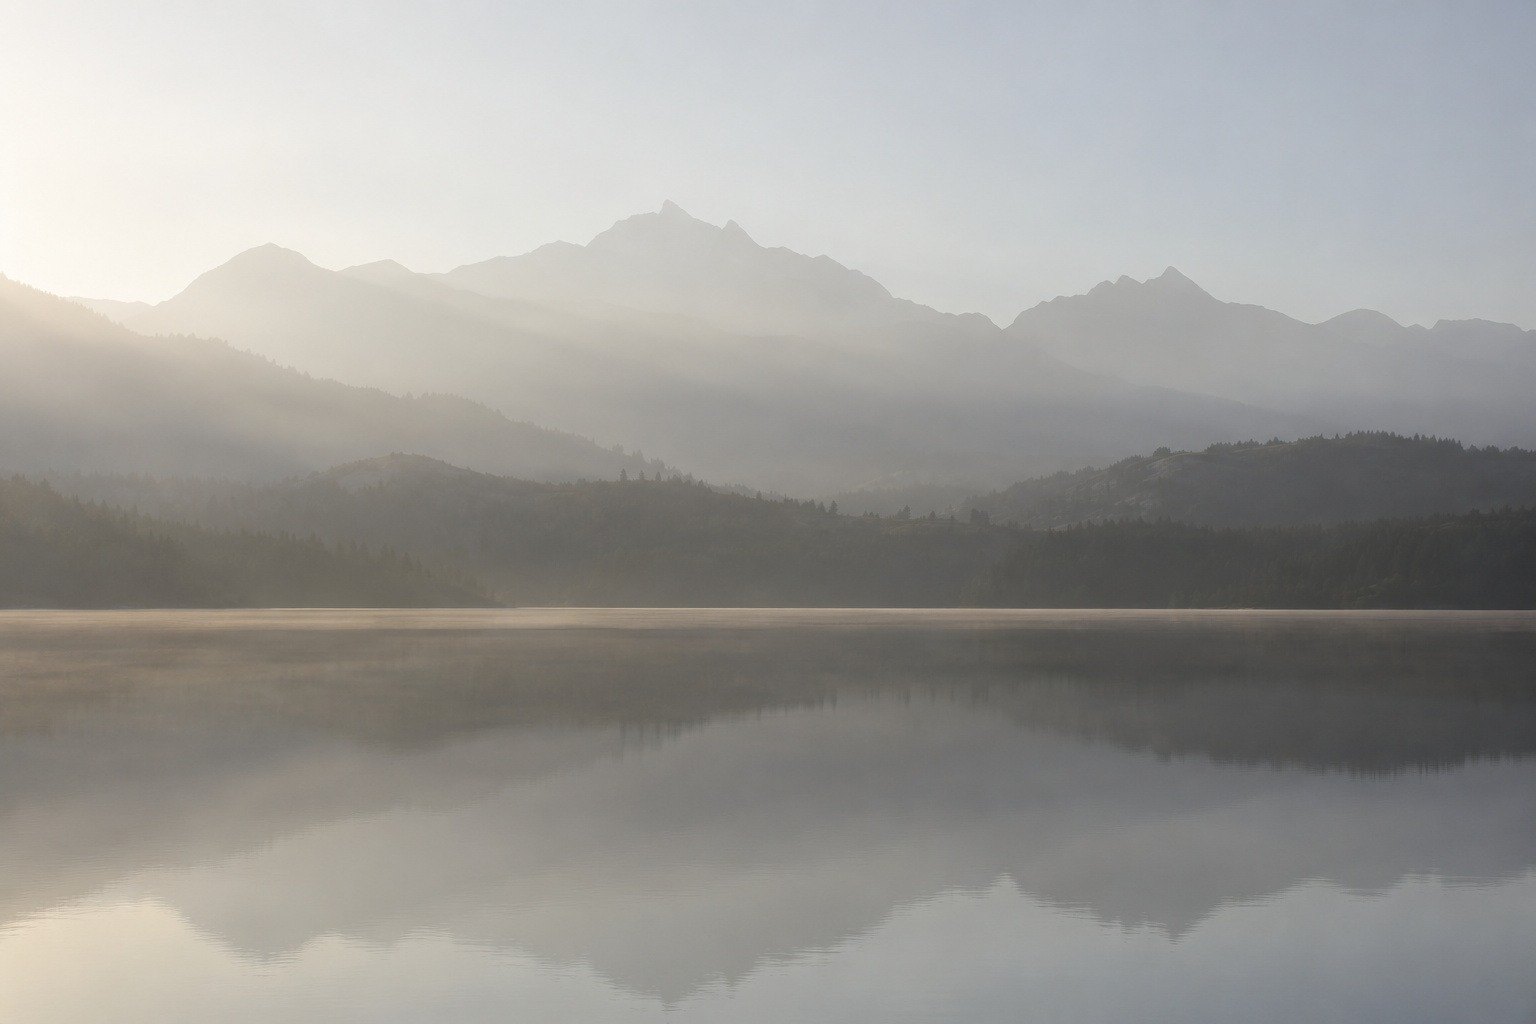
Contrast and color return to the mountains and lake that were hazy with light fog. The distant mountains, where the fog is thicker, are cleared more than the nearby shore.
Good to know
As the note at the bottom of the panel says, these sliders work at the pixel level of the photo, so their strength looks different in Fit view and in the exported file. The 100% view matches the exported file.
If the shooting ISO is 1600 or higher, Auto applies a little Color noise (20 at ISO 1600, 35 at 3200, 50 at 6400, and 60 above that; if you've already set it higher, it's left as is). At ISO 6400 or higher with AI denoise turned off, the status bar suggests trying AI denoise.
The rest of your edits, such as Exposure and Shadows, are applied on top of the denoised photo, so it's fine to readjust brightness after turning on AI denoise.
For each photo, it's computed once the first time you turn it on (a few seconds), and when you zoom to 100%, the visible area is computed once more. On export it's computed again at the original size, so exporting a large photo can take several tens of seconds.
Even the fine texture of bricks or skin can disappear and look like plastic, which is why the default is 70.
returns it to the default of 0, which turns AI denoise off. To turn it back on, click the checkbox.
makes the noise crisper too. Remove the noise first, then raise it only a little.
need a moment to get ready the first time you move them (Computing local contrast…).
- Detail values belong to the "Effects" group in Copy edits and in your own presets (together with Vignette and Grain).
Frequently asked questions
It looked subtle on screen, but stronger (or weaker) in the exported file.
Sharpening, noise reduction and texture work at the pixel level, so Fit view and the exported file look different. Check at 100%.
Is my photo sent over the internet when I use AI denoise?
No. Everything is processed on this PC, and your photo is never sent anywhere.
The AI denoise checkbox is dimmed and can't be clicked.
If you see "The AI denoise model isn't installed." in the panel, a required file is missing. Try reinstalling the app.
Can I use the noise reduction sliders together with AI denoise?
Yes, you can. We recommend removing heavy noise with AI denoise first, then cleaning up only the remaining color blotches with Color noise.
What's the difference between Texture and Clarity?
Texture handles very fine detail such as skin texture or fabric; Clarity handles broader contrast (the contours of a face, masses of cloud).
I want to move Dehaze to the left for a dreamy look.
For a dreamy, soft look, lower Clarity or Contrast toward −. Dehaze works from 0 to 100 to clear away hazy air.