Portrait retouching
Automatically detects the faces and bodies in a photo so you can retouch them with a single slider. Clean up blemishes, dark circles and shine while keeping the skin texture, and finish everything in one place — from clear eyes and white teeth to subtle lipstick and blush, a slimmer jawline and a balanced figure. You can also set many values at once with the Natural · Radiant · Profile photo buttons. All analysis and retouching happen on this PC, and your photos are never sent anywhere.
Detection results can vary from photo to photo, so after retouching, always check the result with Compare original or Split view.
When to use it
- Profile, ID and résumé photos — When you just want to neatly clean up blemishes, shine and shadows under the eyes. One click on Profile photo sets the basic values all at once.
- Light makeup on a bare-faced photo — When you want to add color to the lips, a touch of blush to the cheeks, and more defined eyes.
- Big smiles — When the teeth came out yellowish or the whites of the eyes look dull.
- Full-body photos — When clothing or posture makes the body look wider than it is, or you want the legs to look a little longer.
- Photos of two people or groups — When you want to retouch only one person, or each person differently.
- Men — When you want to reduce only shine and blemishes while keeping stubble and skin texture.
Where to find it
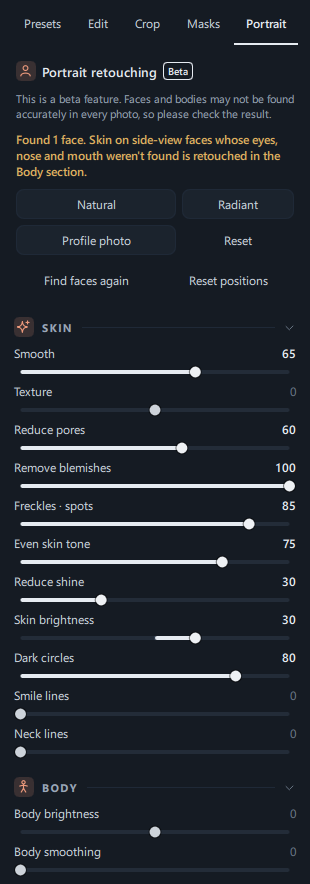
It's the Portrait tab, the last tab in the right panel of the editor (tab order: Presets · Edit · Crop · Masks · Portrait).
From top to bottom, the Portrait tab contains:
- The title Portrait retouching with a Beta label, and a one-line hint
- The detection result message (for example, "Found 1 face.") — a Analyzing photo progress bar while analyzing
- (When available to download) A notice about the extra model — see Extra model below
- (When there are two or more people) All faces · Face 1 · Face 2 … buttons
- 4 quick retouch buttons: Natural · Radiant · Profile photo · Reset
- Find faces again · Reset positions
- 5 panels: SKIN · BODY · EYES · MOUTH · MAKEUP · FACE SHAPE
Click a panel title to collapse or expand that panel. For panels further down, such as Makeup, scroll down.
When you first open it — detecting faces and bodies
When you open the Portrait tab, the photo is analyzed automatically. You don't need to do anything.
- A progress bar such as Analyzing photo · 35% appears in the panel, and the result message shows "Finding faces on this device…".
- When the analysis finishes, the result message changes to a highlight color and tells you how many people were found.
- When a face is detected, the SKIN · EYES · MOUTH · MAKEUP · FACE SHAPE panels become active; when a body is detected, the sliders in the BODY panel become active.
The results of an analysis are saved, so when you open the same photo again they appear right away without waiting.
| Result message | Meaning | What to do |
|---|---|---|
| Found 1 face. | One person was detected. | Go ahead and retouch. |
| Found 2 faces. Select a face above, or apply to all faces together. | Several people were detected. | See Choosing a person below. |
| This is a side view, so the eye, nose and mouth positions weren't found. Facial skin is retouched with the skin sliders in the Body section below. | The face is turned far to the side. | Retouch the facial skin too with Body brightness · Body smoothing in the BODY panel. |
| No face was found, but body skin was. | Body skin such as the arms or neck was detected. | Use the skin sliders in the BODY panel. |
| No face found. | No person was detected in this photo. | Try clicking Find faces again. If that doesn't work, you can retouch just that area with Auto select in Masks. |
| Face detection cancelled. | You cancelled during analysis or moved to another photo. | Click Find faces again. |
Find faces again · Reset positions
| Button | What it does |
|---|---|
| Find faces again | Analyzes the photo again to find faces that were missed. Values and makeup colors applied to faces already detected are kept. While analyzing, the button changes to Cancel analysis; click it to stop the analysis. |
| Reset positions | Detects the positions of the face (eyes, nose, mouth) and body from scratch. The adjustment values you set with the sliders are kept. Use it after installing the extra model, when you want to apply the new method to photos that already have body adjustments. |
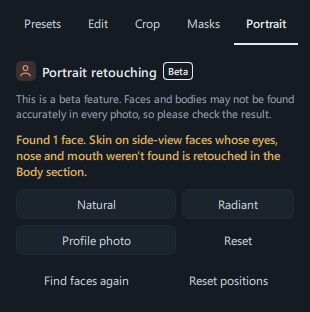
Quick retouch — Natural · Radiant · Profile photo · Reset
One button sets the skin, eye, mouth and face shape sliders to suitable values all at once. After clicking a button, adjust the sliders a little to suit the photo.
| Button | Look |
|---|---|
| Natural | Barely noticeable retouching. Lightly cleans up blemishes, pores, uneven patches and shadows under the eyes, and slightly brightens the whites of the eyes and the teeth. |
| Radiant | Clear, bright skin. Smooths the skin more, reduces shine and brightens the skin tone by one step. Also brings out the irises and lip color a little. |
| Profile photo | A neat, crisp impression. Removes the most blemishes, cleans up shine and smile lines, defines the eyebrows and slims the face slightly. |
| Reset | Returns everything for the selected face — skin, eyes, mouth and face shape, and even makeup — to 0 (makeup colors return to their defaults too). |
Values set by the three buttons (the numbers shown on screen):
| Slider | Natural | Radiant | Profile photo |
|---|---|---|---|
| Smooth | 35 | 55 | 45 |
| Texture | 0 | 0 | 10 |
| Reduce pores | 30 | 50 | 45 |
| Remove blemishes | 50 | 70 | 80 |
| Even skin tone | 30 | 50 | 40 |
| Reduce shine | 0 | 40 | 50 |
| Skin brightness | 0 | 30 | 0 |
| Dark circles | 30 | 50 | 45 |
| Smile lines | 0 | 0 | 30 |
| Whiten eyes | 20 | 35 | 30 |
| Sharpen iris | 0 | 30 | 35 |
| Define brows | 0 | 0 | 20 |
| Whiten teeth | 20 | 35 | 30 |
| Lip color | 0 | 15 | 0 |
| Slim face | 0 | 0 | 15 |
Sliders not in the table (Freckles · spots · Neck lines · Eye size · Narrow nose · Mouth size) are set to 0 by all three buttons.
- Makeup is kept. Values in the Makeup panel, such as lipstick and blush, don't change when you click any of the three buttons. The only button that also clears makeup is Reset.
- The Body panel doesn't change. All four buttons change only face-related values.
- They apply only to the selected face. With several people, they apply to the currently selected face; if you've selected All faces, the same values are applied to every face.
- If you adjusted sliders yourself before clicking a button, those values are replaced with the button's values. Press Ctrl+Z once to return to the state before the click.
Choosing a person (several people)
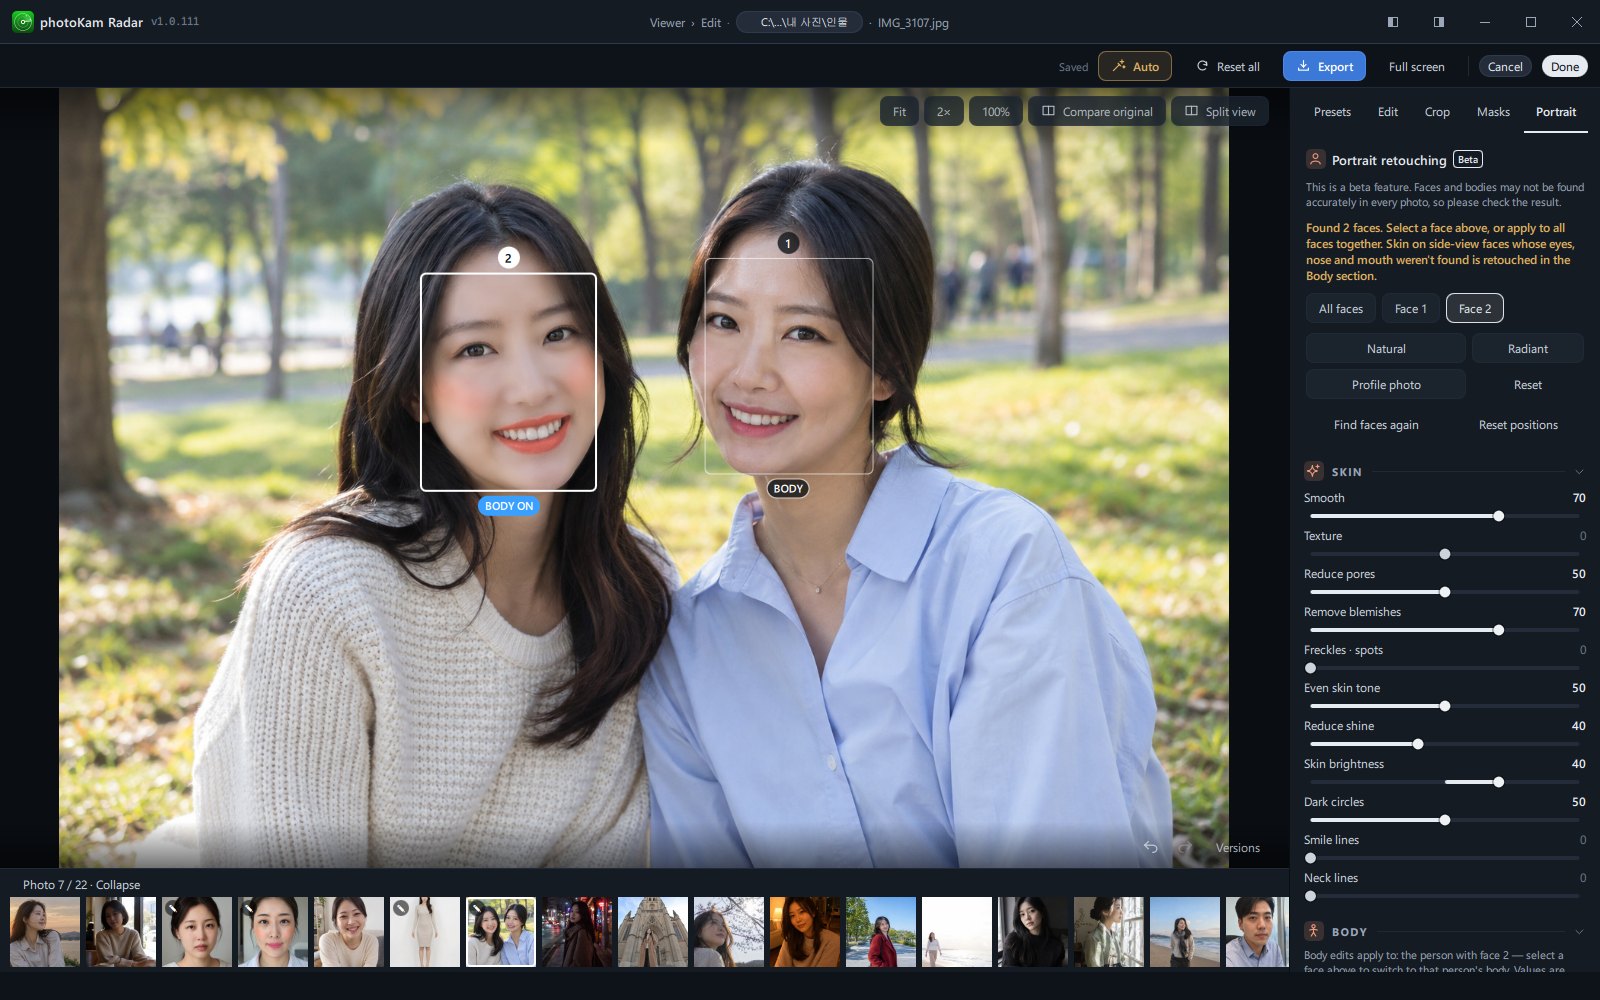
When two or more people are detected, you can choose who to retouch. Up to 8 faces are detected per photo.
- Markers on the photo — Each detected face gets a round outline, with a number (1, 2, …) above it and a BODY marker below it. The currently selected face gets a thicker white outline. The marker of the person whose body you're currently retouching changes to a blue BODY ON.
- How to select — Click a face outline or a BODY marker on the photo, or click the Face 1 · Face 2 … buttons in the panel. Selecting a face also switches body retouching to the same person.
- All faces — Face-related sliders (skin, eyes, mouth, makeup, face shape) and the quick retouch buttons apply to all faces together. The numbers shown on the sliders are then Face 1's values, and moving a slider sets that value for every face to the same value. The person whose body is retouched doesn't change.
- Saved separately for each person — Face values and body shape values are saved separately for each person. If you select someone else and come back, that person's values are still there. However, Body brightness · Body smoothing apply to the body skin in the whole photo, so they apply to everyone together.
- The top of the Body panel shows whose body you're currently retouching, for example "Body edits apply to: the person with face 2 — select a face above to switch to that person's body…".
- The first time you select a person, there's a short analysis to detect that person's body. Select another person after the analysis finishes (switching during it shows "Can't switch people while faces are being found. Select again when it's done.").
- The markers on the photo are hidden while Compare original is on.
Sliders and buttons
All sliders default to 0. There are two kinds of sliders.
- 0–100 — Sliders that move in one direction only (for example, Remove blemishes). At 0 the effect is off, and the higher the value, the stronger the effect.
- −100–100 — Sliders centered on 0 (for example, Skin brightness). Moving right (+) and left (−) changes things in opposite directions.
Double-click a slider or its name to return it to 0; dragging the name left and right also changes the value (hold Shift while dragging to fine-tune). You can also click the number to type a value. These common actions are explained in detail in Editor overview.
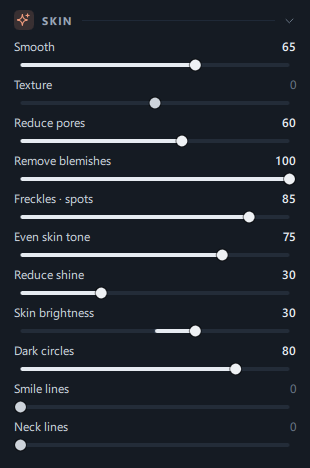
Skin panel
Applies to the skin inside the face outline and up the forehead (excluding hair). It avoids the eyes, eyebrows and lips. It keeps the skin texture (very fine detail such as pores), so the face doesn't turn smeary and plastic-looking even at high values.
| Name | Range | Default | What it does |
|---|---|---|---|
| Smooth | 0–100 | 0 | Smooths out unevenness slightly larger than skin texture, such as blotches and fine lines. Very fine texture is reduced only a little, keeping the skin's texture. |
| Texture | −100–100 | 0 | The + side makes skin texture crisper (good for men and close-ups); the − side smooths the texture further. |
| Reduce pores | 0–100 | 0 | Softens only very fine texture, such as the pores on the nose or cheeks. It's processed so that texture stays alive even at the original size. |
| Remove blemishes | 0–100 | 0 | Fills small spots that are darker or redder than their surroundings (pimples, blemishes) with the surrounding skin. |
| Freckles · spots | 0–100 | 0 | Finds and removes only small, round brown spots. Nostrils, wrinkles, shadows and hair are left alone. |
| Even skin tone | 0–100 | 0 | Evens out patches of different skin color, such as flushed cheeks, toward the face's average skin color. |
| Reduce shine | 0–100 | 0 | Evenly fills areas on the forehead, nose and cheeks that turned white from reflected light with the skin color right next to the reflection. A little skin texture and soft glow are kept. |
| Skin brightness | −100–100 | 0 | Makes only the facial skin brighter (+) or darker (−). The background and clothing stay as they are. |
| Dark circles | 0–100 | 0 | Brightens the dark area below the lower eyelids toward the color of the cheeks. Areas under the eyes that are already bright aren't changed. |
| Smile lines | 0–100 | 0 | Fills the lines that run from the sides of the nose down to the corners of the mouth. Removing them completely makes the face look flat, so even at 100 it fills only about 70% of the crease and keeps the shadow at the corners of the mouth. |
| Neck lines | 0–100 | 0 | Fills horizontal lines on the front and sides of the neck. It avoids hair, ears, collars and necklaces. It takes a lot of computation, so Applying… appears on the photo briefly. |
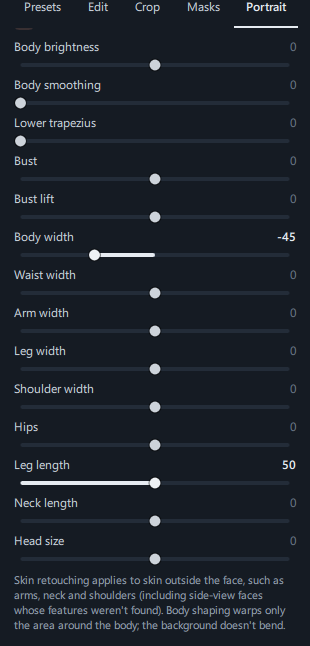
Body panel
Retouches skin outside the face (arms, neck, shoulders) and the shape of the body. Sliders are enabled to match what was detected in the photo, and the others are dimmed.
| Name | Range | Default | What it does |
|---|---|---|---|
| Body brightness | −100–100 | 0 | Makes skin outside the face, such as the arms, neck and shoulders, brighter (+) or darker (−). This also includes the skin of side-view faces whose position wasn't detected. |
| Body smoothing | 0–100 | 0 | Softly cleans up small blotches and fine hair texture on the body's skin. Large-scale shading, such as the contours of muscle and bone, stays as it is. |
| Lower trapezius | 0–100 | 0 | Lowers the line running from the neck to the shoulders (the muscle between them), so the neckline looks longer and the shoulder line smoother. The area right next to the neck stays put; the part halfway between the neck and the end of the shoulder drops the most. |
| Bust | −100–100 | 0 | Naturally reduces (−) or adds (+) volume in the bust area. Applies to photos taken from the front or side. |
| Bust lift | −100–100 | 0 | Neatly lifts the height of the bust area (+) or lowers it naturally (−). Appears only in photos where the body was detected with the extra model. |
| Body width | −100–100 | 0 | Makes the torso, arms and legs slimmer (−) or fuller (+) all at once. Appears only in photos where the body was detected with the extra model. |
| Waist width | −100–100 | 0 | Makes the waist slimmer (−) or wider (+). |
| Arm width | −100–100 | 0 | Makes the upper and lower arms slimmer (−) or wider (+). The change fades gradually toward the shoulders and wrists so it blends naturally. |
| Leg width | −100–100 | 0 | Makes the thighs and calves slimmer (−) or wider (+). |
| Shoulder width | −100–100 | 0 | Makes the shoulders narrower (−) or broader (+). |
| Hips | −100–100 | 0 | Makes the side lines of the pelvis and hips narrower (−) or wider (+). |
| Leg length | 0–100 | 0 | Stretches the area from below the pelvis to the ankles vertically (up to about 12% at 100). The floor below the feet is reduced by the same amount, so the photo size stays the same. Photos with little space below the feet are stretched less. |
| Neck length | −100–100 | 0 | Stretches or shortens the area between the chin and the shoulders to make the neck longer (+) or shorter (−). The head moves up or down accordingly. |
| Head size | −100–100 | 0 | Makes the head smaller (−) or larger (+) relative to the body. |
When sliders become active
| Slider | Active when |
|---|---|
| Body brightness · Body smoothing | Skin outside the face (arms, neck, shoulders and so on) is detected |
| Lower trapezius · Bust | The shoulder line is detected |
| Waist · arm · leg width, Shoulder width, Hips, Leg length, Neck length, Head size | The body's pose (shoulder, elbow, pelvis and knee positions) is detected — upper-body or full-body photos |
| Bust lift · Body width | The extra model is installed and that person's body was detected with it (only then do these sliders appear) |
The bottom of the Body panel shows one line about the current photo. If it says "Skin retouching applies to skin outside the face, such as arms, neck and shoulders (including side-view faces whose features weren't found). Body shaping warps only the area around the body; the background doesn't bend.", you can use all the sliders; if it says "Body shaping isn't available because the shoulders weren't found.", you can use only the skin sliders.
- The background doesn't bend. Body shape sliders move only the area around the body's outline, and the effect fades gradually to 0 toward the outside, keeping straight lines such as walls or door frames behind the person intact. However, Leg length stretches the part below the pelvis across the full width, so the background at the same height is stretched too.
- Angled poses — When the body is turned to one side, the far side is changed less so it doesn't look odd. With the extra model, body shaping follows the body's actual direction even when it's at an angle or seen from behind, and areas where an arm covers the front of the body are told apart so outlines connect smoothly.
Eyes · Mouth panel
The small icon in front of each slider name (eye whites, iris, eyebrows, teeth, lips) shows at a glance which part it affects.
| Name | Range | Default | What it does |
|---|---|---|---|
| Whiten eyes | 0–100 | 0 | Brightens the whites of the eyes slightly and removes yellow or red tints. The irises and eyelashes stay as they are. |
| Sharpen iris | 0–100 | 0 | Makes the iris pattern crisper, deepens its color a little and brightens it slightly. |
| Define brows | 0–100 | 0 | Makes the eyebrow hairs crisper and a little darker. |
| Whiten teeth | 0–100 | 0 | Whitens only the bright, yellowish areas inside the mouth (the teeth). It avoids the red of the lips and gums. |
| Lip color | −100–100 | 0 | Makes the natural color of the lips stronger (+) or paler (−). To apply a different color, use Lipstick in the MAKEUP panel. |
Makeup panel
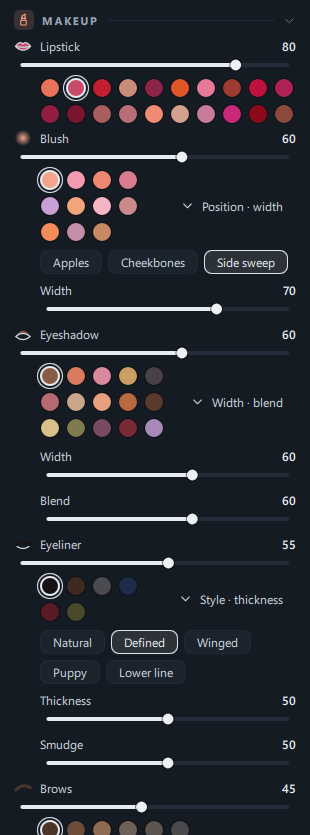
Each area has a strength slider + color chips, and for Blush · Eyeshadow · Eyeliner · Contour · Highlighter you can also choose position · width · style with the expand button on the right. Only color is added while the shading and texture of the skin and lips are kept, so it doesn't look painted on even at high strength. The makeup areas follow the 3D shape of the face, so even on a turned face they're applied to fit the shape of the cheeks and eyelids.
| Name | Range | Default | What it does | Colors |
|---|---|---|---|---|
| Lipstick | 0–100 | 0 | Applies lipstick color to the whole lips. Lip lines and gloss are kept. | 20 |
| Blush | 0–100 | 0 | Softly tints the cheeks. Depending on the position, it's applied to just the apples of the cheeks, up to the cheekbones, or on past the cheekbones toward the temples. | 11 |
| Eyeshadow | 0–100 | 0 | Applies color that's strongest near the lashes and fades toward the eyebrows. The height fits the size of that person's eyelids. The eye itself isn't colored. | 15 |
| Eyeliner | 0–100 | 0 | Draws a line along the upper lash line, thin at the inner corner and thicker toward the outer corner. Choose the tail shape with the style. | 6 |
| Brows | 0–100 | 0 | Fills in the brows with a pencil or powder color. Gaps between hairs get more color and already dark hairs get less, so the hair texture remains; the front (near the nose) is lighter and the tail darker. | 7 |
| Contour | 0–100 | 0 | Darkens the sides of the face (temples to jawline), under the cheekbones and both sides of the nose bridge with warm shadow, making the face look more three-dimensional. It's strongest where the face turns away to the side. In photos with the head turned, the hidden (far) side isn't colored. | — |
| Highlighter | 0–100 | 0 | Subtly brightens the tops of the cheekbones, the nose bridge, above the upper lip, the center of the forehead and the tip of the chin to add glow. | — |
Position · width · style — Click Position · width · Width · blend · Style · thickness at the bottom right of the slider to expand them (they start collapsed).
| Area | What you can choose | Default | Description |
|---|---|---|---|
| Blush | Position: Apples · Cheekbones · Side sweep / Width 0–100 | Cheekbones · 50 | Apples colors only the center of the cheeks that rises when you smile; Cheekbones colors from the cheeks toward the cheekbones; Side sweep continues the color in a long sweep up toward the temples. Raising Width spreads the color wider and softer; lowering it gives a crisper shape. |
| Eyeshadow | Width · Blend 0–100 | 50 · 50 | Width colors upward from about 30% (0) to 75% (100) of the distance from the lash line to the eyebrow, and sideways 18–33% beyond the outer corner of the eye. Raising Blend spreads the edge widely and fades it upward; lowering it makes the edge crisp. |
| Eyeliner | Style: Natural · Defined · Winged · Puppy · Lower line | Natural | Natural is a thin line that fills in between the lashes; Defined is a thick line; Winged extends the outer corner up into a long line; Puppy extends the outer corner slightly downward; Lower line adds the outer two-thirds of the lower lash line to Natural. |
| Eyeliner (thickness · smudge) | Thickness · Smudge 0–100 | 50 · 50 | Thickness is the width of the line; Smudge blurs the edges of the line and surrounds it above and below with a soft shadow, as if a pencil line had been rubbed (it looks less drawn on). |
| Brows | Thickness 0–100 | 50 | Sets how much wider than the natural brows to fill. |
| Contour · Highlighter | Width 0–100 | 50 | Raising Width spreads the shadow or glow wider and softer. |
- Photos that had makeup applied before the October 2026 update keep their old look. Changing the position · width · style for that face redraws it the new way (a notice appears in the expanded area).
Color chips — Click a round chip below the slider to switch to that color. Hover over a chip to see the color's name. If you click a chip while the strength is 0, the strength turns on at 50, so you can start by choosing a color. The selected chip gets an outline, and the icon in front of the slider name also changes to that color.
| Area | Available colors (from left; the default is first) |
|---|---|
| Lipstick | Coral · Rose · Red · Nude · Berry · Orange · Pink · Brick · Cherry Red · Raspberry · Plum Red · Wine · Rose Brown · Dried Rose · Peach Coral · Beige Nude · Mauve Pink · Fuchsia · Deep Red · Cocoa |
| Blush | Peach · Pink · Coral · Rose · Lavender · Apricot · Baby Pink · Rose Brown · Orange · Mauve · Bronze |
| Eyeshadow | Brown · Coral · Pink · Gold · Smoky · Rose · Beige · Peach · Orange Brown · Dark Brown · Champagne Gold · Khaki · Plum · Burgundy · Lavender |
| Eyeliner | Black · Brown · Gray · Navy · Burgundy · Khaki |
| Brows | Dark Brown · Brown · Light Brown · Ash Brown · Gray Brown · Gray · Black |
- Makeup values and colors are saved separately for each face. You can give two people different lipstick colors.
- The quick retouch buttons (Natural · Radiant · Profile photo) don't change makeup. Reset returns makeup and colors to their starting state too.
Face Shape panel
| Name | Range | Default | What it does |
|---|---|---|---|
| Slim face | −100–100 | 0 | Pulls the jawline and lower cheeks inward for a slimmer face (+), or pushes them outward for a wider one (−). |
| Eye size | −100–100 | 0 | Makes the eyes larger (+) or smaller (−). |
| Narrow nose | −100–100 | 0 | Makes the width of the nostrils narrower (+) or wider (−). |
| Mouth size | −100–100 | 0 | Makes the mouth larger (+) or smaller (−). |
As the note below the Face Shape panel says ("Face shape changes stay within a natural range, and the background doesn't bend."), even at 100 the changes stay within a range where the person is still recognizable.
Extra model
You can separately download an extra model that makes portrait retouching more accurate (about 865 MB, downloaded only once). Even without it, all the basic portrait retouching features are available.
What changes when it's installed
- Body shaping follows the body's actual direction even when the body is at an angle or seen from behind.
- Areas where an arm covers the front of the body are told apart, so waist and arm outlines connect smoothly.
- Body width and Bust lift sliders appear in the BODY panel.
How to download it
- If the extra model is available to download when you open the Portrait tab, the "Extra model for portrait retouching" window appears. The window shows the exact file size.
- Click Download to start downloading. To download it later, click Later.
- Even if you clicked Later, a notice and a Download extra model button stay at the top of the Portrait tab, so you can download it any time.
- While downloading, the panel shows the progress, such as "Downloading extra model · 42% (360MB / 865MB)", and you can stop it with Cancel download. You can keep retouching the current way while it downloads.
- When the download finishes, the "Extra model installed" window appears. There's nothing else you need to do.
After installing
- It's applied right away to the photo you're viewing.
- Other photos get it automatically when you open them in the Portrait tab.
- Photos that already have body adjustments keep them. To apply the new method to those photos too, click Reset positions on the Portrait tab (adjustment values are kept).
Good to know
- The internet is used only to download this model. After installation, all analysis and retouching happen on this PC.
- If the connection drops during the download, it retries automatically after a moment and resumes from where it left off. The downloaded file is checked for damage before it's installed.
- If the download fails, the message "Couldn't download the extra model: …" and a Try again button appear.
- The notice and the window appear when the extra model is available to download. Basic retouching works fully either way.
Step by step
One person's face — natural in 3 minutes
- Open the editor
In the full view, click Edit at the top, then click the Portrait tab in the right panel.
- Wait a moment for detection
When the progress bar finishes and "Found 1 face." appears, you're ready.
- Click Natural
Blemishes, pores, shadows under the eyes and skin tone are all cleaned up at once.
- Touch up what's left
If some spots are still noticeable, raise Remove blemishes to 70–80; for lots of brown spots, raise Freckles · spots to about 40; if the area under the eyes is dark, raise Dark circles to about 50.
- Shine
If the forehead or nose looks shiny and white, raise Reduce shine to 40–60.
- Check
Toggle Compare original off and on with \, or turn on Split view with Y and drag the center line to compare before and after. If it looks overdone, lower Smooth a little.
- Finish
Click Done at the top to save and close, or create a new file with Export.
Light makeup on a bare face
- Open the Makeup panel
Scroll down the Portrait tab and expand the MAKEUP panel.
- Lipstick
Click Rose in the color chips. The strength turns on at 50; for everyday photos, try lowering it to 30–40.
- Blush
Choose Peach or Pink and set the strength to 20–30. If the cheeks look like round patches, expand Position · width, choose Cheekbones or Side sweep, and raise Width to 60 or more.
- Eyes
Eyeshadow in Brown at 20–30 and Eyeliner in Brown at about 20 look natural. For more defined eyes, switch the eyeliner to Black and choose Defined or Winged under Style · thickness. To make the eyelids look larger, raise the eyeshadow's Width.
- Contours
Bring out the sides of the face with Contour at 15–25, and add glow to the nose bridge and cheekbones with Highlighter at 15–25.
- Just a hint of natural lip color
If you want to add only a healthy flush without changing the color, raise Lip color in the EYES · MOUTH panel to about +20 instead of using Lipstick.
(The numbers above are suggested starting values. Adjust them to suit the photo and your taste.)
A big smile — teeth and eye whites
- On the Portrait tab, expand the EYES · MOUTH panel.
- Raise Whiten teeth to 30–50. The lips and gums keep their color, so the teeth don't look like white dentures.
- Raise Whiten eyes to about 30, and if the eyes look dull, raise Sharpen iris to 20–30.
- Turn on split view with Y and zoom in around the mouth to check.
Only one of two people
- When you open the Portrait tab on a photo of two people, "Found 2 faces. …" appears, and each face in the photo gets a number.
- Click the face outline of the person you want to retouch (or Face 2 in the panel). The outline becomes thick and white, and the marker below that person changes to a blue BODY ON.
- When you move a slider, it applies only to that person. The other person's face stays the same.
- To give both people the same retouching, click All faces and then click Natural.
- To retouch each person differently, select Face 1 and retouch, then switch to Face 2 and retouch again. Values are saved separately for each person.
Full-body photos — body shaping
- Open the Portrait tab on a full-body photo. If the extra model download window appears, installing it gives more accurate results (Extra model).
- If Body width appears in the BODY panel, set it to −15 to −25 to naturally slim the whole body. To adjust individual parts, set for example Waist width −20 and Arm width about −15.
- To make the legs look longer, raise Leg length to 20–30.
- If the neckline looks short, raise Lower trapezius to 20–30, or raise Neck length a little toward +.
- Turn on split view with Y and check that straight lines behind the body, such as door frames or wall corners, haven't bent.
Men — clean, with skin texture kept
- Click Natural.
- Lower Smooth to about 20 and raise Texture to +10 to +20 to bring out the skin texture.
- If there's shine, raise Reduce shine to about 40. Areas that aren't skin-colored, such as stubble, change less.
- If needed, raise Define brows to 20.
Result
 BeforeAfter
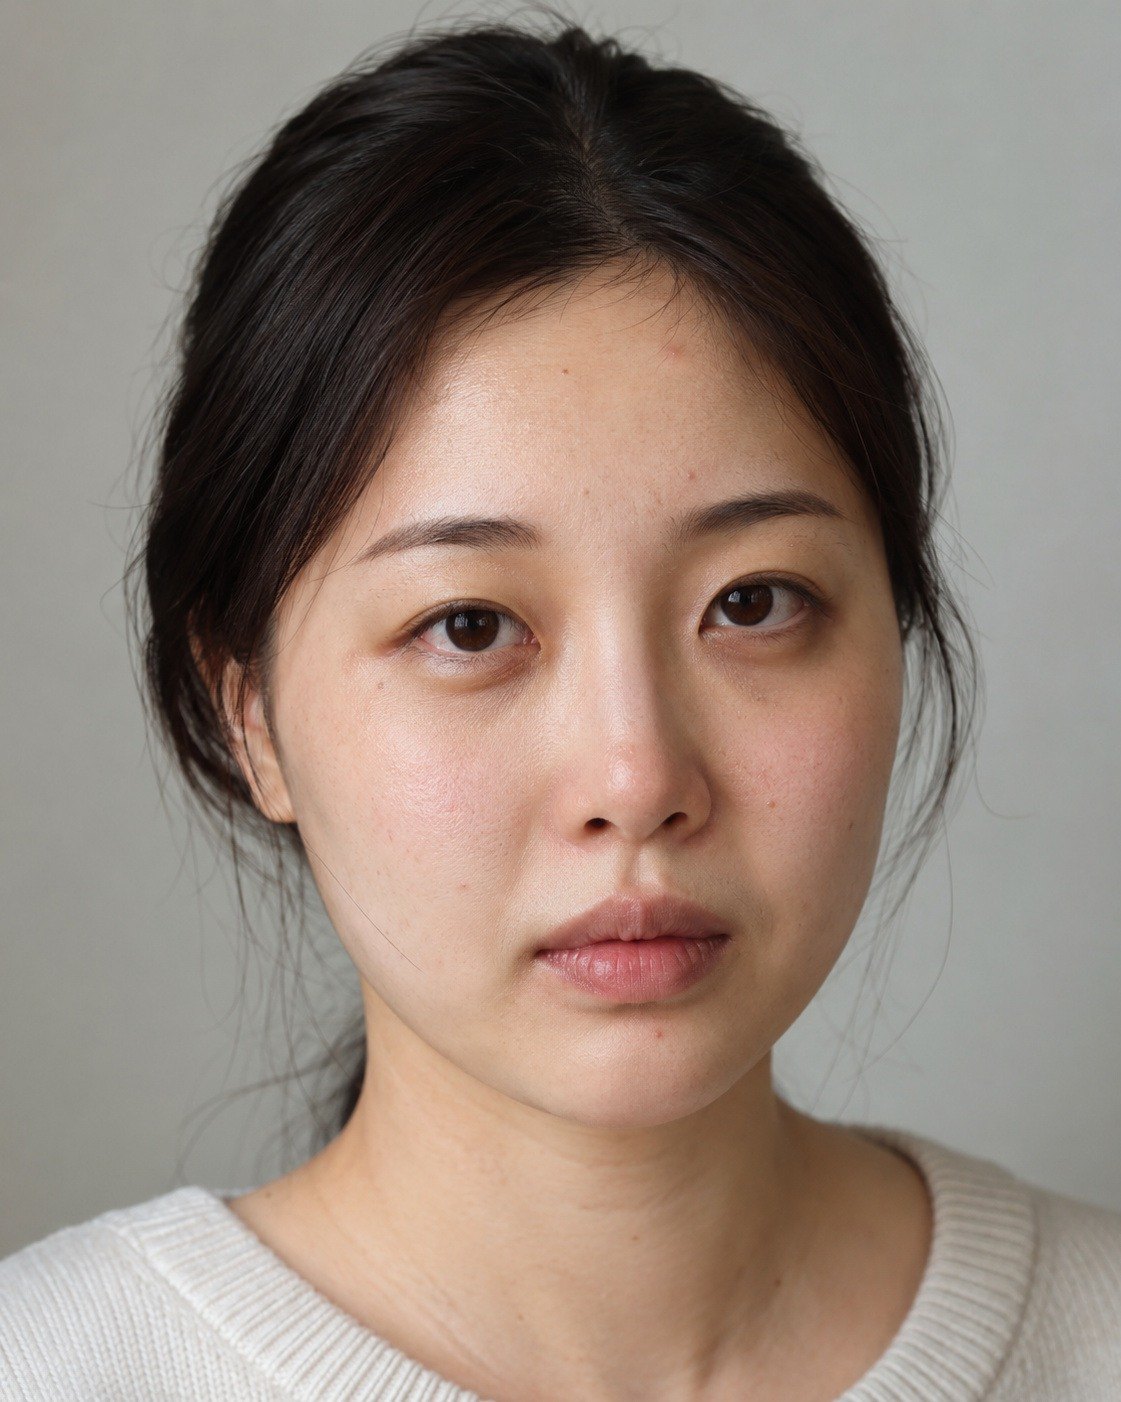
Small blemishes, flushed cheeks and shadows under the eyes are cleaned up, while pores and skin texture remain.
The people in the sample photos were generated by AI.
 BeforeAfter
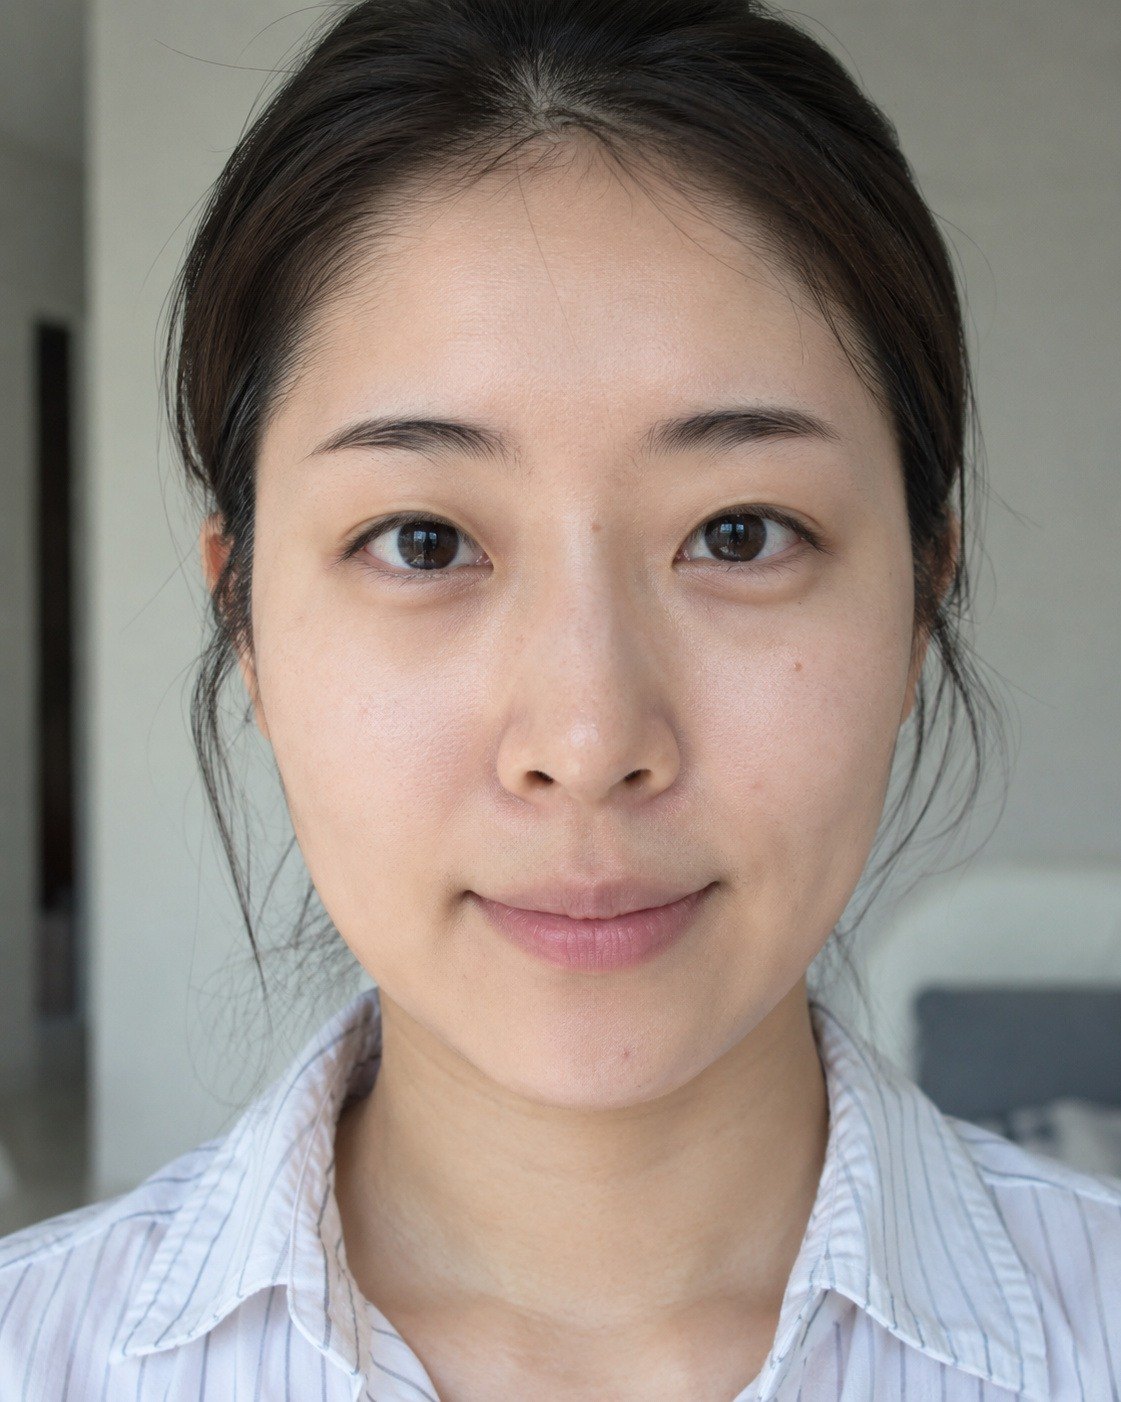
Subtle color is added to the bare lips, cheeks and eyelids, and the brows look more defined as the gaps between hairs are filled in. Lip lines and skin texture remain.
The people in the sample photos were generated by AI.
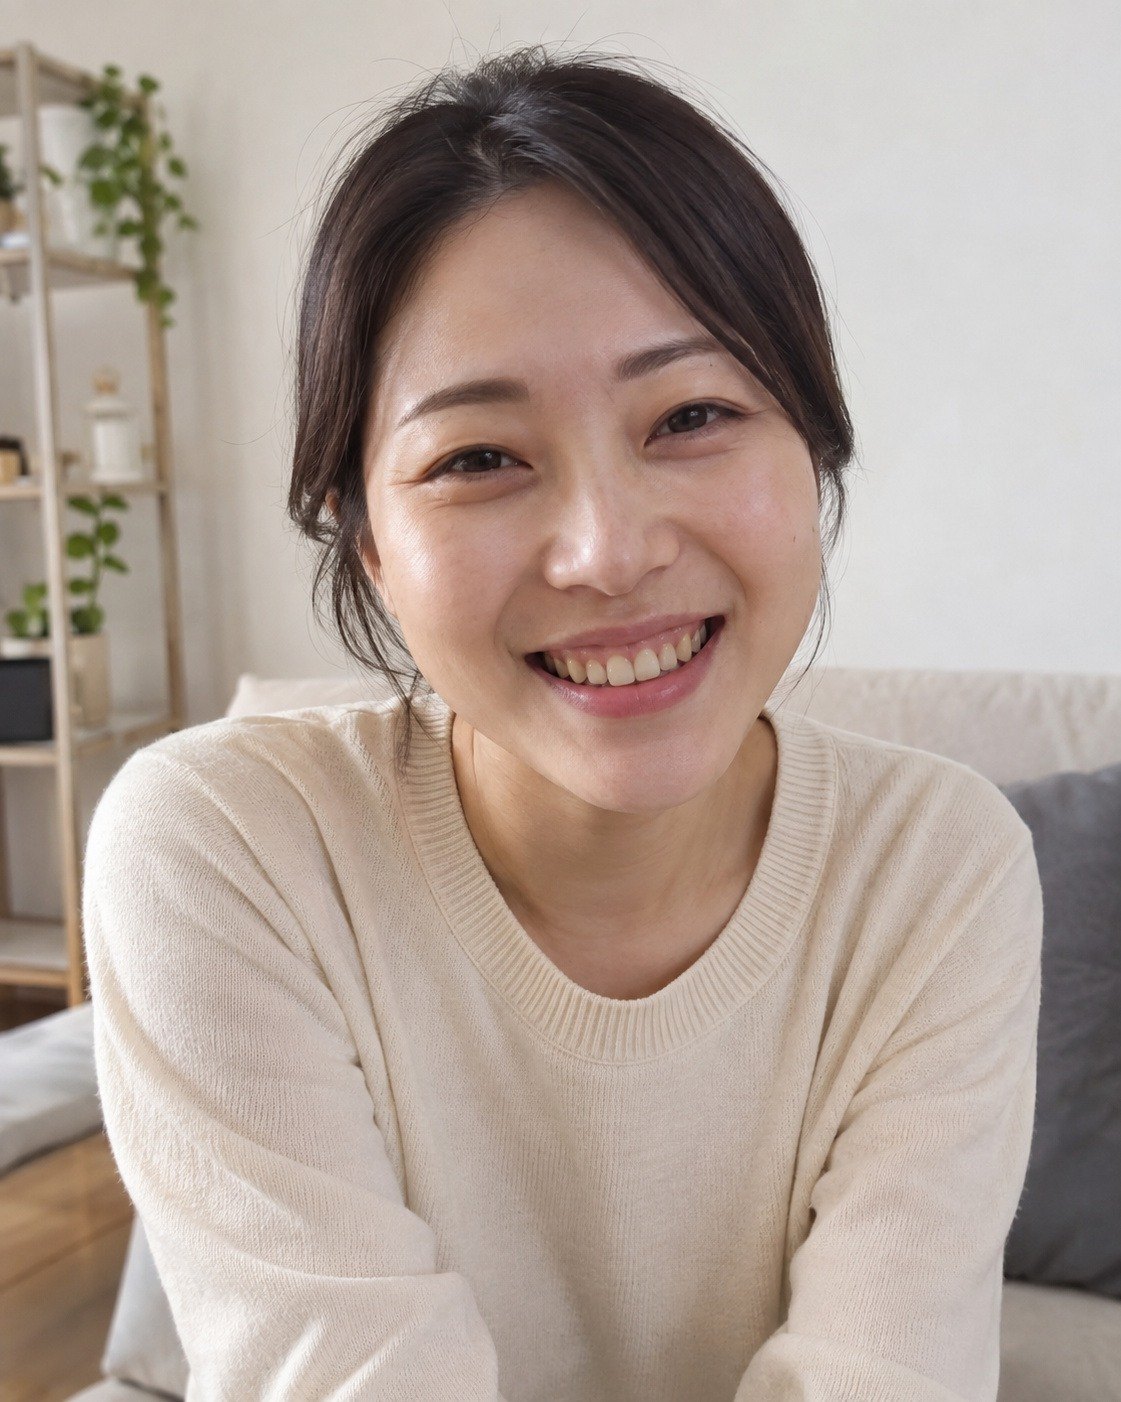
 BeforeAfter
Yellowish teeth and dull eye whites become clear. The color of the lips and gums doesn't change.
The people in the sample photos were generated by AI.
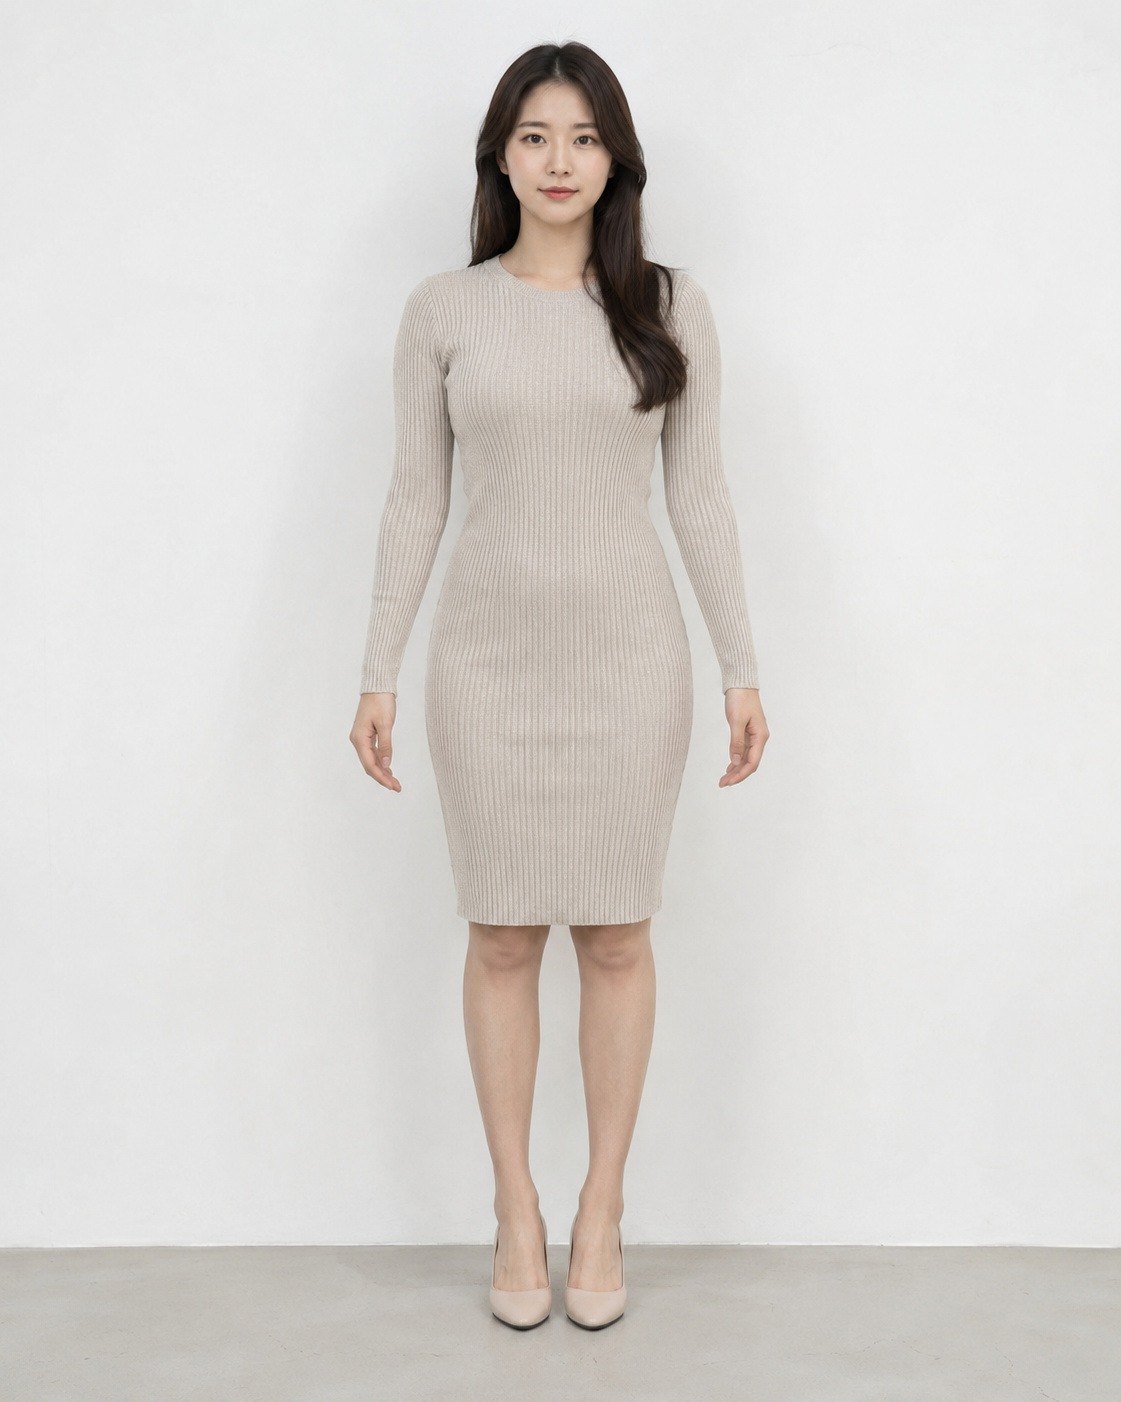
 BeforeAfter
The figure is naturally refined and the legs look longer. The corners of the white wall behind stay straight.
The people in the sample photos were generated by AI.
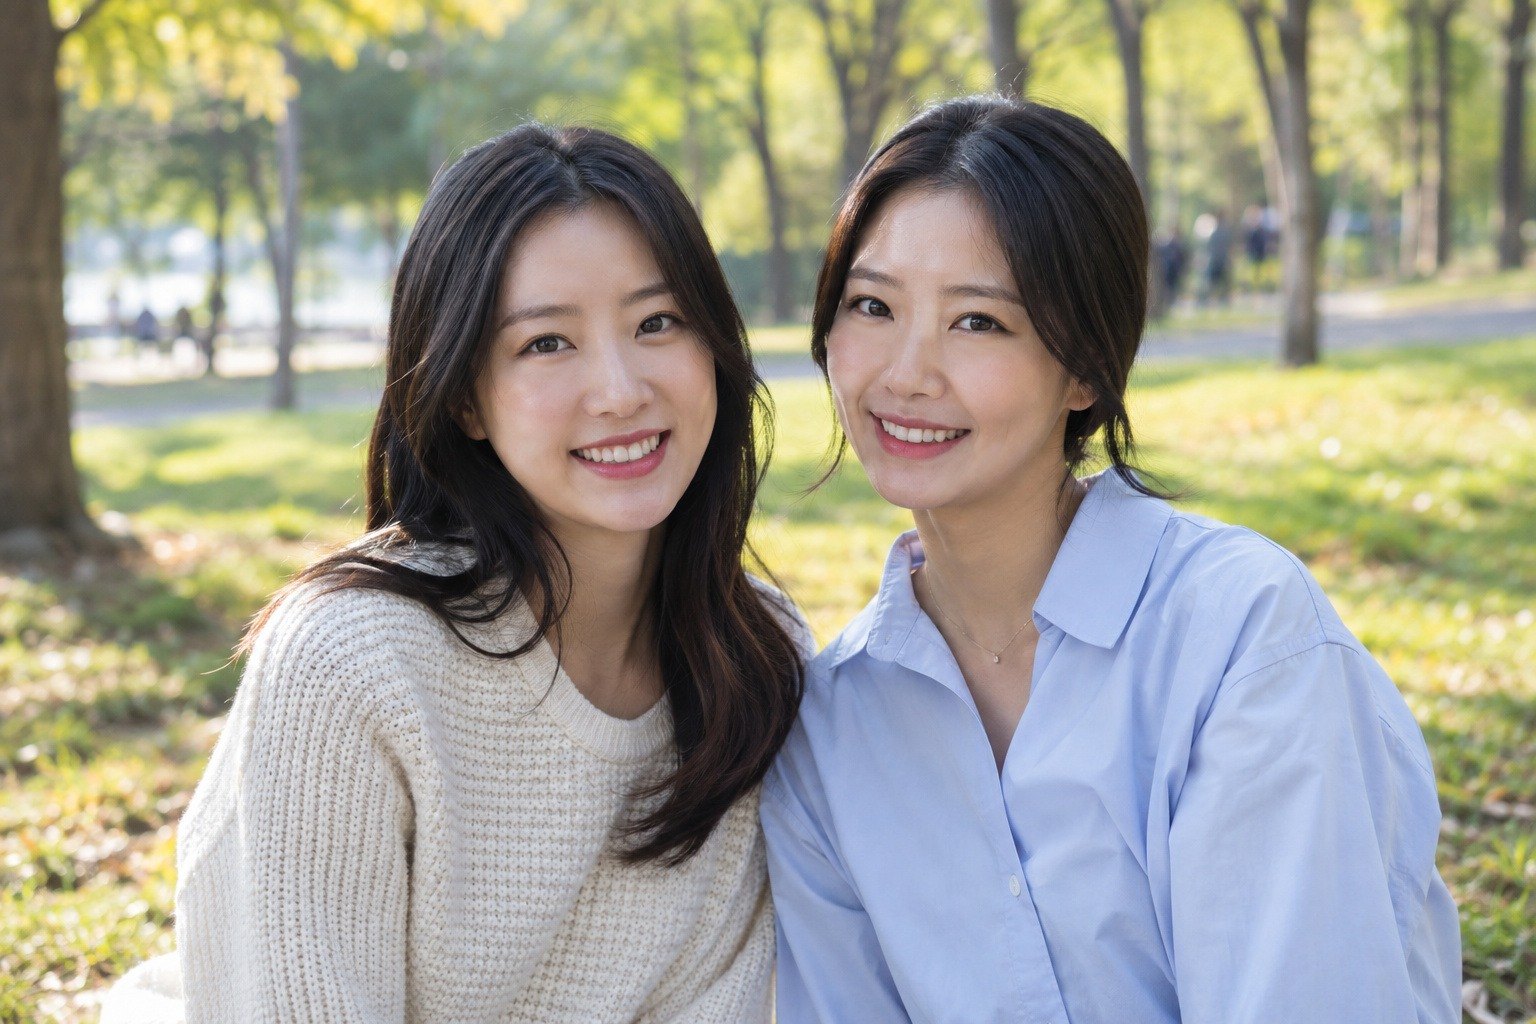
 BeforeAfter
Only the selected person's skin and lip color change; the person next to them stays the same.
The people in the sample photos were generated by AI.
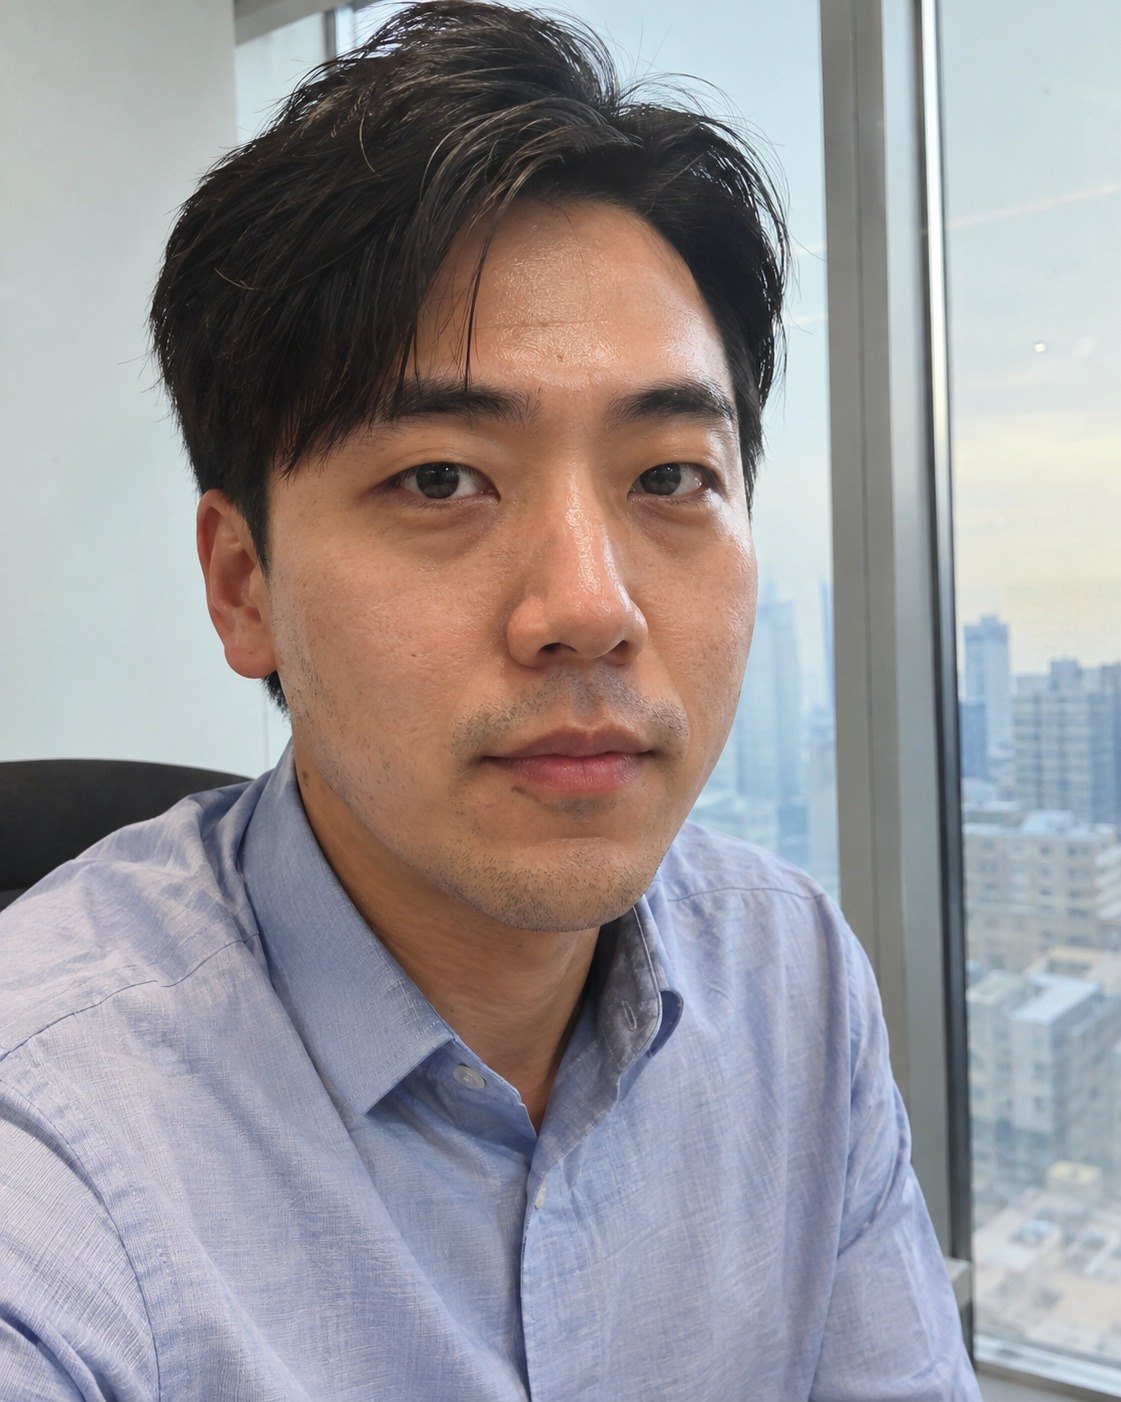
 BeforeAfter
Shine and blemishes are reduced while stubble and skin texture remain, so the retouching doesn't show.
The people in the sample photos were generated by AI.
Good to know
- The original stays untouched. Like other edits, portrait retouching is saved only as edit values, and the original file isn't changed. The retouching is applied when you create a new file with Export. Exported photos look the same as on screen, and skin texture stays alive even at the original size.
- A little at a time, comparing as you go. Each slider is designed to look natural even at high values, but raising many sliders high at once makes the retouching noticeable. Check often with the Y split view.
- For shaded faces, start with Auto. For backlit photos where the face came out dark, first click Auto at the top of the editor. If there's a person, it measures the face brightness and brightens shaded faces. Then retouch the skin on the Portrait tab. To brighten just the face further, raise Skin brightness toward +.
- Very small faces (such as the back row of a group photo) are left as they are. Portrait retouching applies to faces large enough to show skin texture.
- Side-view faces: if the eye, nose and mouth positions are hard to find, the facial skin is retouched with the skin sliders in the BODY panel.
- Leg length stretches the background too. Other body sliders change only the area around the body's outline, but Leg length stretches the part below the pelvis across the full width. For photos with floor patterns or stairs, always check the result.
- Applying… — For sliders that take a lot of computation, such as Neck lines, this message appears on the photo briefly after you finish adjusting. When it disappears, the change has been applied.
- Each photo is retouched separately. Portrait retouching is saved for each photo to match its face positions, so Copy edits / Paste edits (Ctrl+Shift+C / Ctrl+Shift+V) and Presets carry over all your other edits except portrait retouching. To give several photos the same look, the quickest way is to click a quick retouch button on each photo. In the editor, you can move on to the next photo with Ctrl+→ (or PgDn) and keep working.
- Reset on the Portrait tab and Reset all at the top are different. Reset clears only the face-related values of the selected face, while Reset all clears all edits to the photo, including the crop (and portrait retouching). Both can be undone with Ctrl+Z.
- If you want to change only the skin color — Select Face skin · Body skin in Auto select on the Masks tab to change the color and brightness of just those areas.
- Each slider adjustment can be undone with one press of Ctrl+Z and redone with Ctrl+Shift+Z.
Frequently asked questions
Is my photo sent somewhere to be analyzed?
No. Detecting faces and bodies and retouching them all happen on this PC. The internet is used only the first time you download the extra model.
My face wasn't detected.
Try clicking Find faces again. Faces that are heavily covered, very small or turned far to the side may not be detected (beta). For a side view, you can retouch the skin with the skin sliders in the BODY panel; if that doesn't work either, retouch just that area with Auto select (Face skin) in Masks.
A slider is dimmed and won't move.
The part that slider needs wasn't detected in this photo. Face sliders need a face, body skin sliders need skin outside the face, and body shape sliders need the shoulders or the body's pose to be detected before they become active (see the "When sliders become active" table above). Sliders are also dimmed until the analysis finishes.
I don't see the Body width and Bust lift sliders.
These two sliders appear only when the extra model is installed and the body in that photo was detected with it. If you retouched the body in this photo before installing the extra model, click Reset positions.
I retouched one person, but another person changed too.
All faces was probably selected. Click that person's face on the photo or select Face 1 · Face 2, then move the slider. Undo changes already made with Ctrl+Z.
When I switched to All faces, the slider numbers changed.
With All faces, the sliders show Face 1's values. Moving a slider in this state gives every face the same value, so to keep different values for each person, select the faces one at a time before adjusting.
When I clicked Natural, the values I'd adjusted changed.
The quick retouch buttons set the skin, eye, mouth and face shape values anew to the button's values (makeup and body stay the same). Press Ctrl+Z once to return to the state before the click. It's easiest to click a button first and then adjust the sliders.
When I clicked Reset, the makeup disappeared too.
Reset returns makeup and makeup colors to their starting state too. Undo it with Ctrl+Z. To keep the makeup and start over with just the skin, click another button such as Natural.
Can I pick my own lipstick color?
Choose from the colors in the color chips (20 for lipstick, 11 for blush, 15 for eyeshadow, 6 for eyeliner, 7 for brows) and set the intensity with the slider.
When I raised Leg length, the background stretched too.
Leg length works by stretching the area below the pelvis vertically, so the background at the same height is stretched too. The photo size stays the same because the floor below the feet is reduced. If the background has straight patterns, lower the value.
After I clicked Reset all, all the sliders on the Portrait tab are dimmed.
Reset all also clears the detected face positions. Click Find faces again to detect them again (or undo with Ctrl+Z).
Can I paste the same portrait retouching onto several photos?
Portrait retouching is done for each photo to match its face positions (Paste edits and presets carry over everything else). In the editor, move on to the next photo with Ctrl+→ and click a quick retouch button.
Can I use it in the free version?
Yes. Anyone can use every feature in the free version. The only difference is a light watermark on exported photos (you can preview it in the editor too — Free and full versions).