Crop · Rotate · Perspective
Reframe your photo. Cut away edges you don't need, set the aspect ratio, level a tilted horizon, and straighten buildings that seem to lean back because you shot them looking up from below. The original stays untouched, and you can reopen the crop at any time to widen or change it.
When to use it
- When the horizon in a sea or lake photo is slightly tilted and bothers you
- When you want a 1 : 1 square or a 9 : 16 portrait shape for social media
- When you want to crop out a utility pole, a passer-by or a finger caught at the edge
- When the camera recorded the wrong orientation and the photo is lying on its side — 90° rotation
- When you shot a cathedral or tall building from below, so its vertical lines converge toward the top and it seems to fall backward — Perspective
- When you shot at an angle instead of straight on, so one wall looks smaller — Perspective
Where to find it
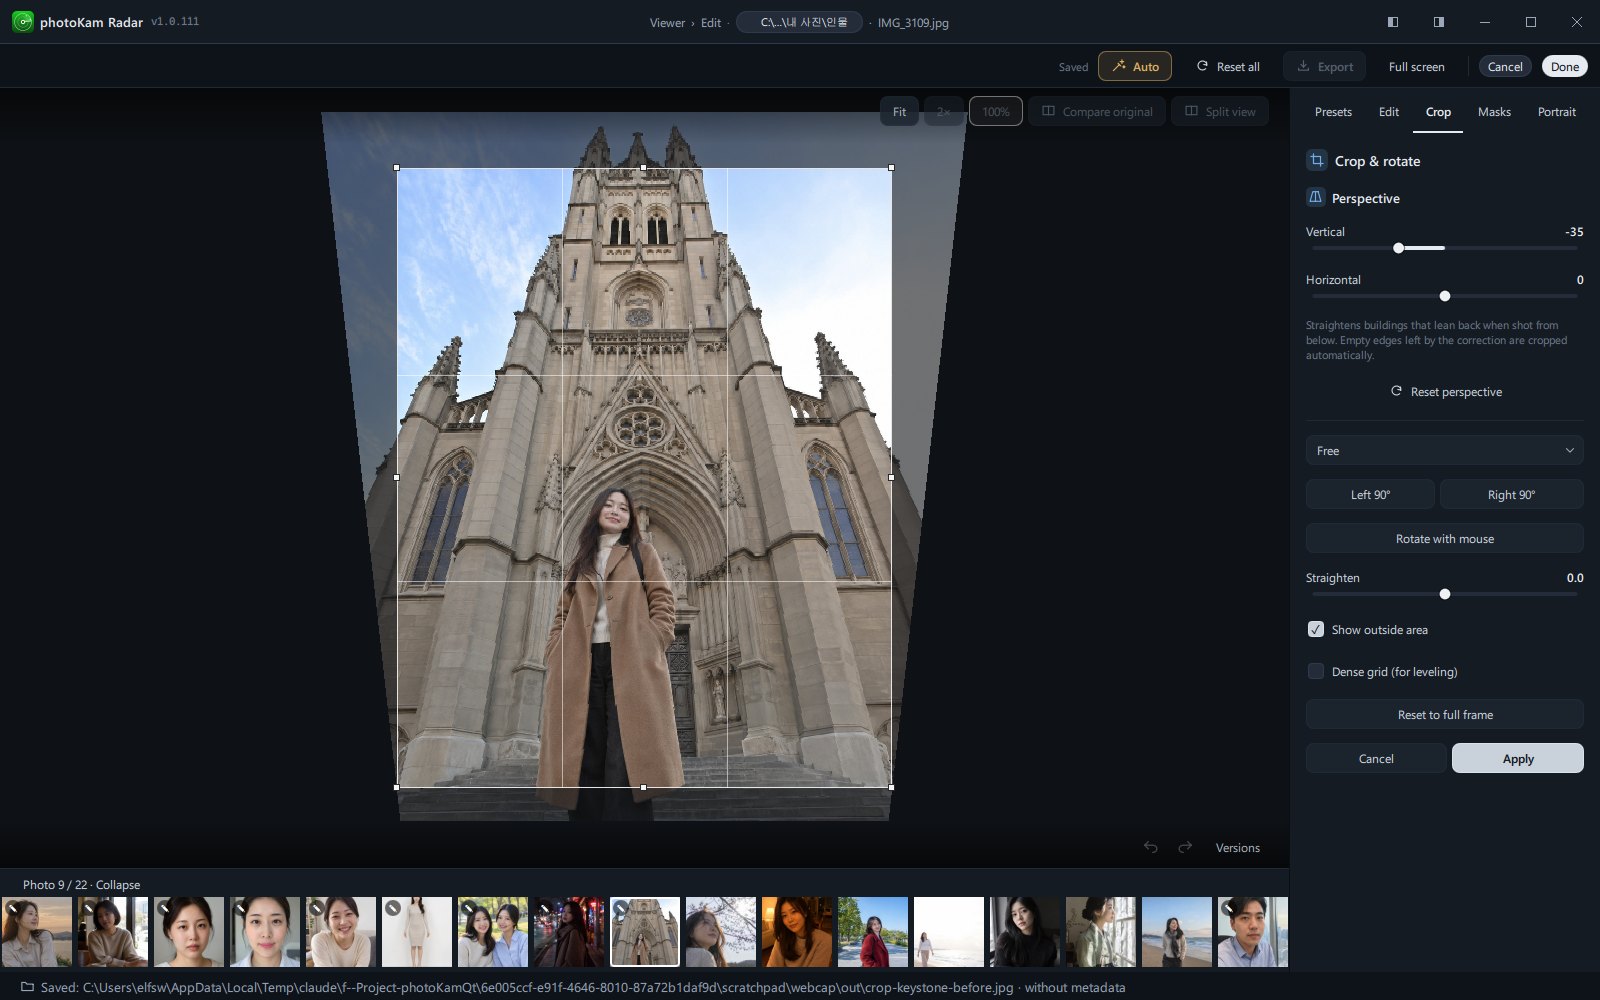
It's on the Crop tab at the top right of the editor (tab order: Presets · Edit · Crop · Masks · Portrait).
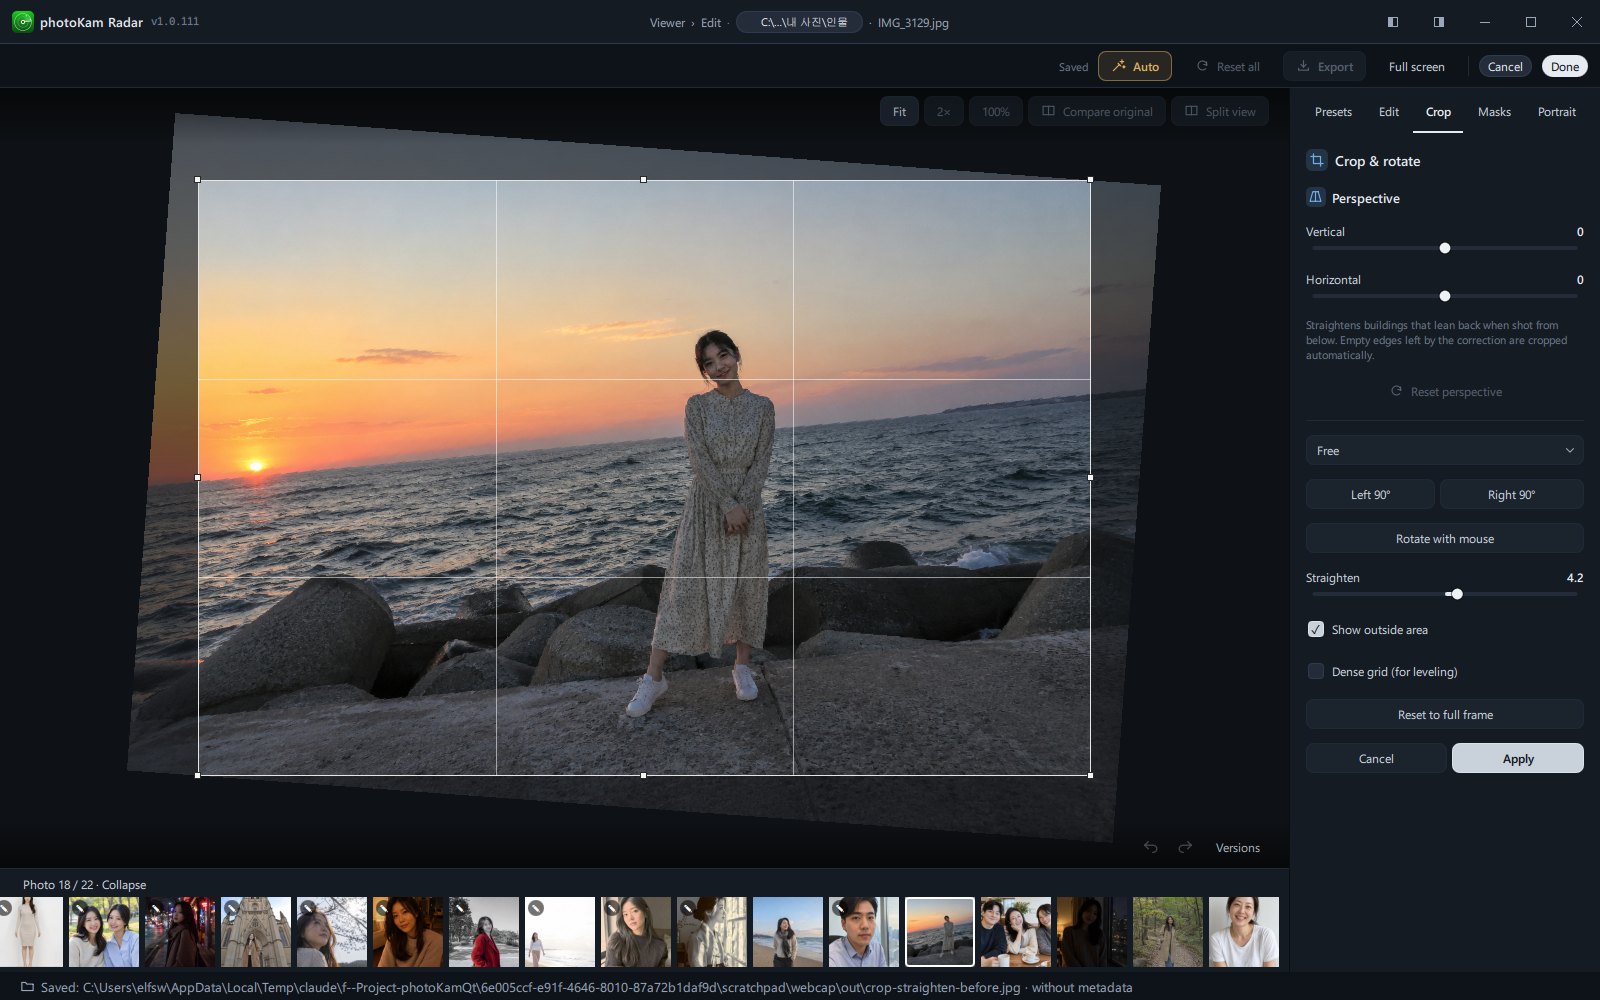
Clicking the tab puts you straight into crop mode. A margin appears around the photo, so it looks a little smaller, and a crop frame (a white border, a 3 × 3 grid and 8 handles on the corners and sides) appears over the photo. The right panel is titled Crop & rotate and contains, from top to bottom:
- Perspective — Vertical · Horizontal sliders, Reset perspective
- Aspect ratio list
- Left 90° · Right 90°
- Rotate with mouse
- Straighten slider
- Show outside area · Dense grid (for leveling)
- Reset to full frame
- Cancel · Apply
Step by step
1. Crop to a ratio — a square photo for social media
- Click the Crop tab
You go straight into crop mode, and the crop frame appears over the photo.
- Choose 1 : 1 in the ratio list
The frame becomes a square.
- Move the frame to compose the shot
Drag inside the frame so that the person or main subject sits near a line or intersection of the 3 × 3 grid.
- Drag a handle to set the size
Dragging a corner handle makes the frame bigger or smaller while keeping it square. If Show outside area is on, the part to be cut off looks darker.
- Double-click inside the frame
The crop is applied, you return to the Edit tab, and the cropped photo fills the view.
2. Level a tilted horizon
- Open the Crop tab.
- Turn on Dense grid (for leveling)
A 12 × 12 grid appears, making it easier to compare against the horizon.
- Slowly drag the Straighten slider
Move it until the horizon is parallel to the grid's horizontal lines. When the photo rotates, it's enlarged just enough to avoid empty corners, so the edges are cropped a little.
- Fine-tune with a number
Click the number field of Straighten, type a value with up to one decimal place, such as
-1.5, and press Enter. - Or rotate with the mouse
Turn on Rotate with mouse and drag in a circle on the photo until the horizon is level. The grid becomes dense automatically while you drag. When you're done rotating, click Rotation mode once more to turn it off.
- Click Apply.
3. Straighten a building shot from below — Perspective
- Open the Crop tab.
- Drag the Vertical slider
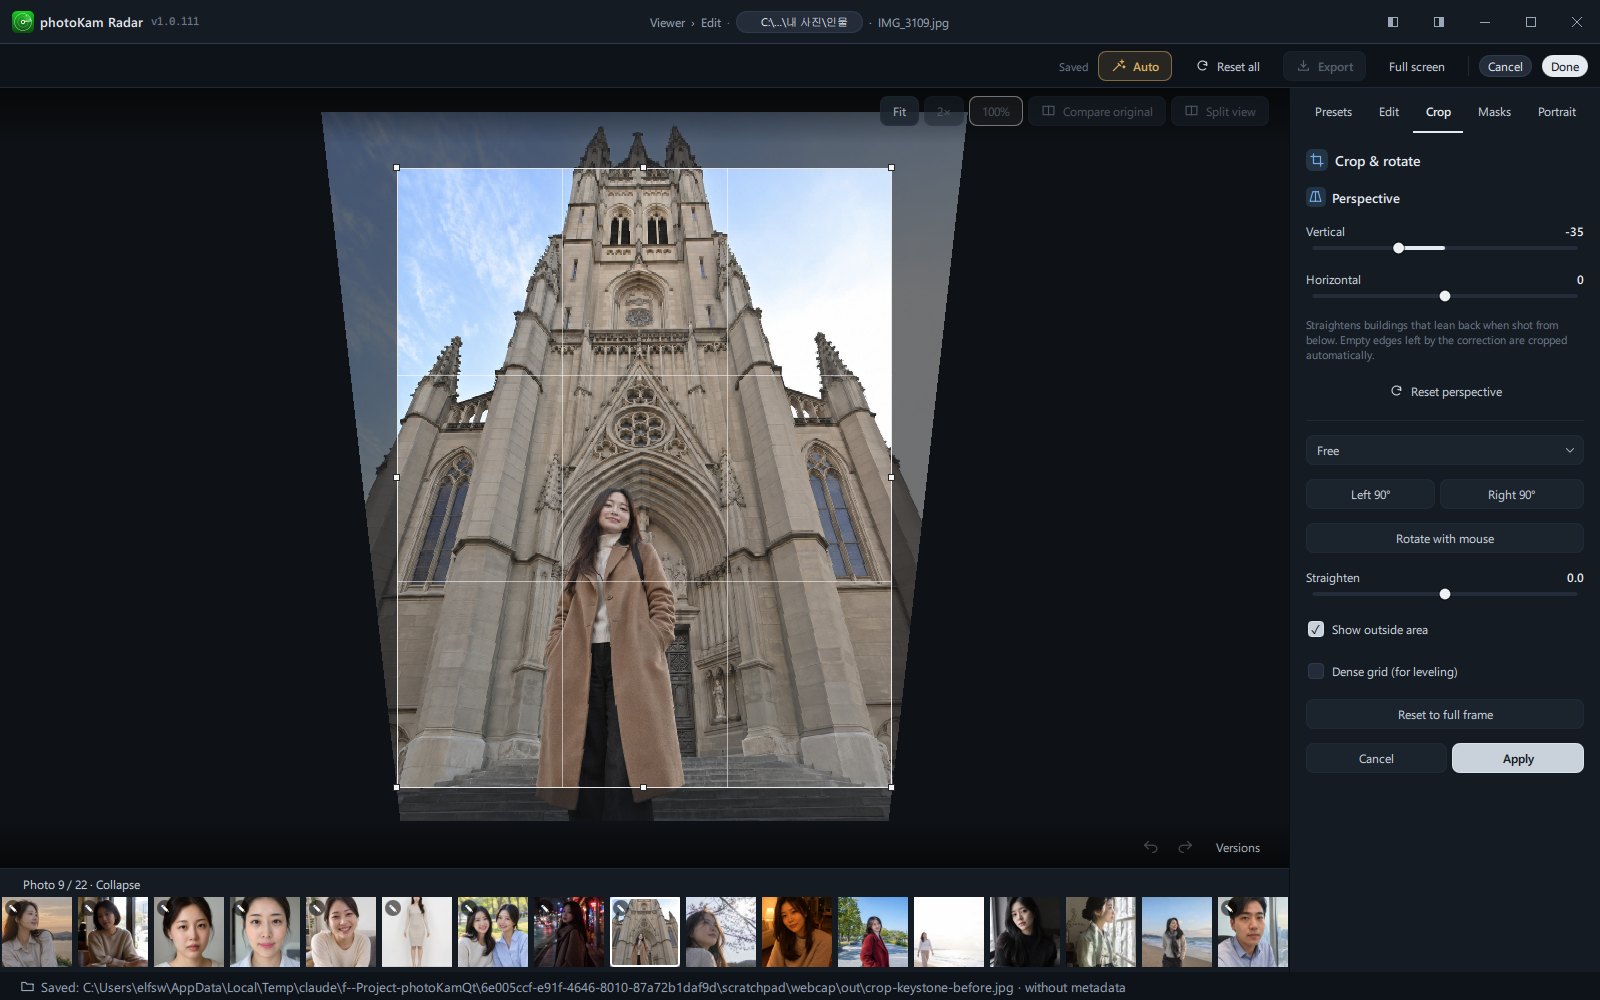
For a building that narrows toward the top, dragging toward the − side usually widens the top and stands the vertical lines up straight. In the example photo below (a cathedral shot from below), the vertical lines of the tower stood straight at −35.
You stay in crop mode while dragging, and the photo is shown in its actual tilted trapezoid shape. Parts that fall outside the crop frame look blurred.
- Line up both edges of the building with the grid's vertical lines
Turning on Dense grid (for leveling) makes this easier. If you straighten it too much, the building gets wider toward the top and looks odd, so it looks more natural to stop slightly short.
- Adjust Horizontal too if needed
If one wall looks smaller because you shot at an angle, even out the left and right heights with Horizontal.
- Refine the frame
The edges are cut off in proportion to the perspective correction. Check that the top of the building isn't cut off, and move the frame.
- Click Apply.
4. Stand up a photo lying on its side — 90° rotation
- Open the Crop tab.
- Click Left 90° or Right 90°
Each click rotates the photo 90°. The ratio returns to Free, so if you need a specific ratio, choose it after rotating.
- Click Apply.
5. Widen a cropped photo again, or go back to the start
- Open the Crop tab again
The cropped-away area is visible again, with the current crop frame on top of it.
- To widen the crop, drag the handles outward.
To go all the way back to the start, click Reset to full frame and Reset perspective, then click Apply.
Result
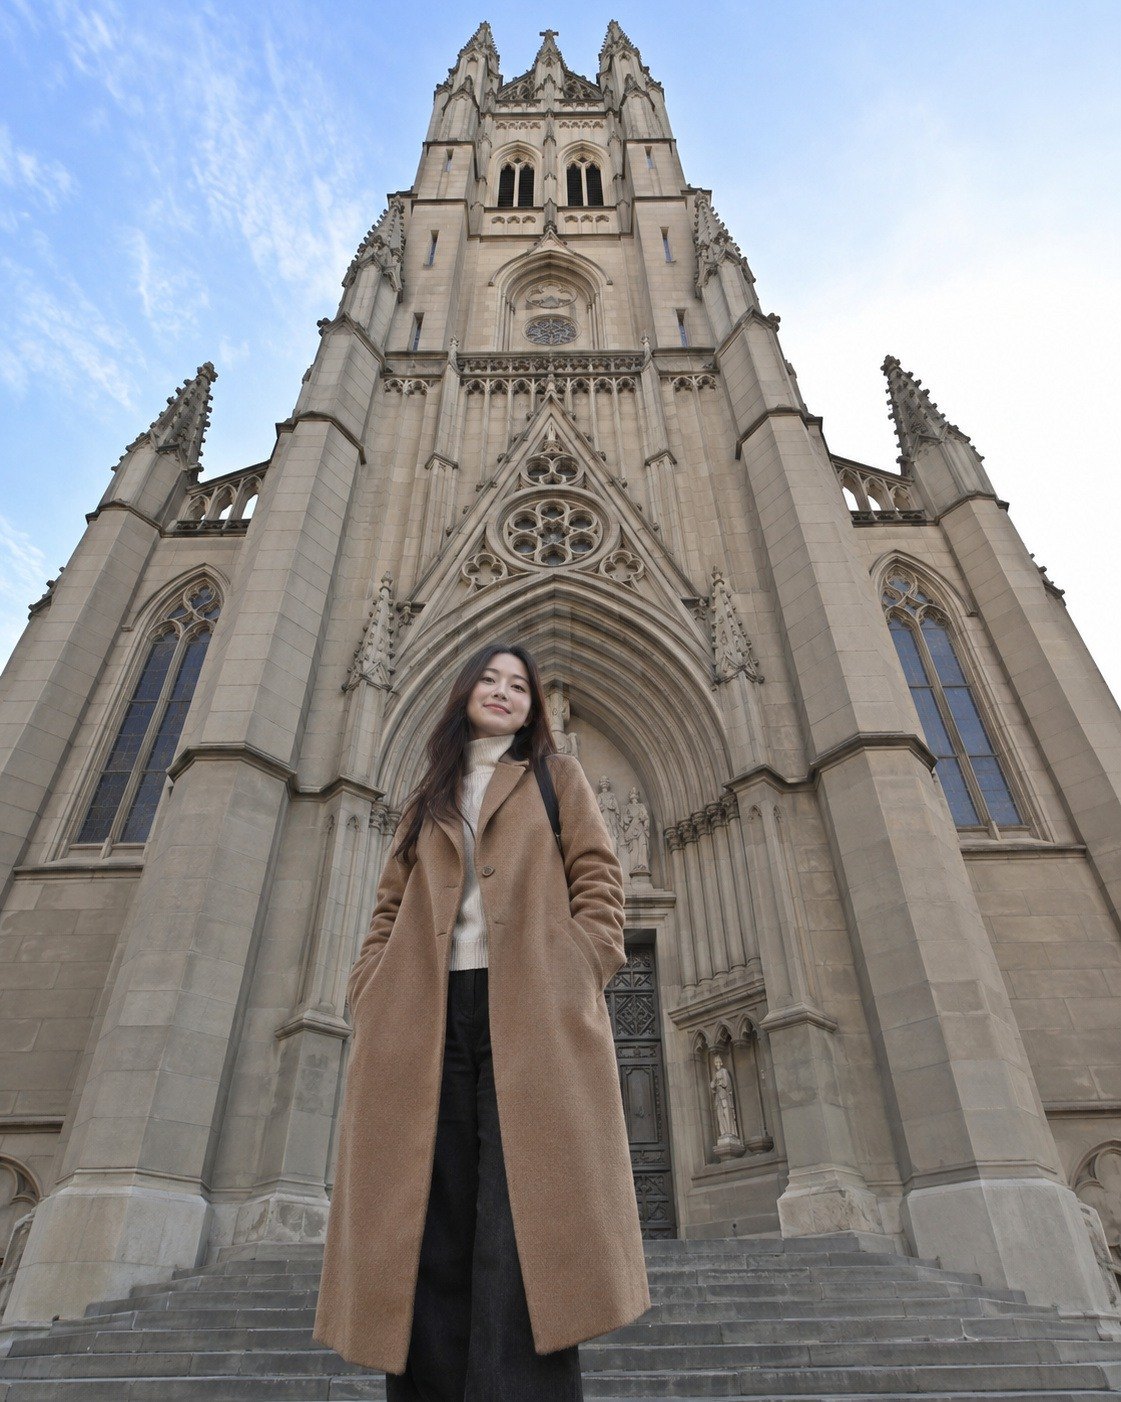
 BeforeAfter
The building's vertical lines, which converged toward the top, now stand parallel, and the sense that the building is falling backward disappears. The person still stands naturally, and the edges are cropped a little in proportion to the perspective correction.
The people in the sample photos were generated by AI.
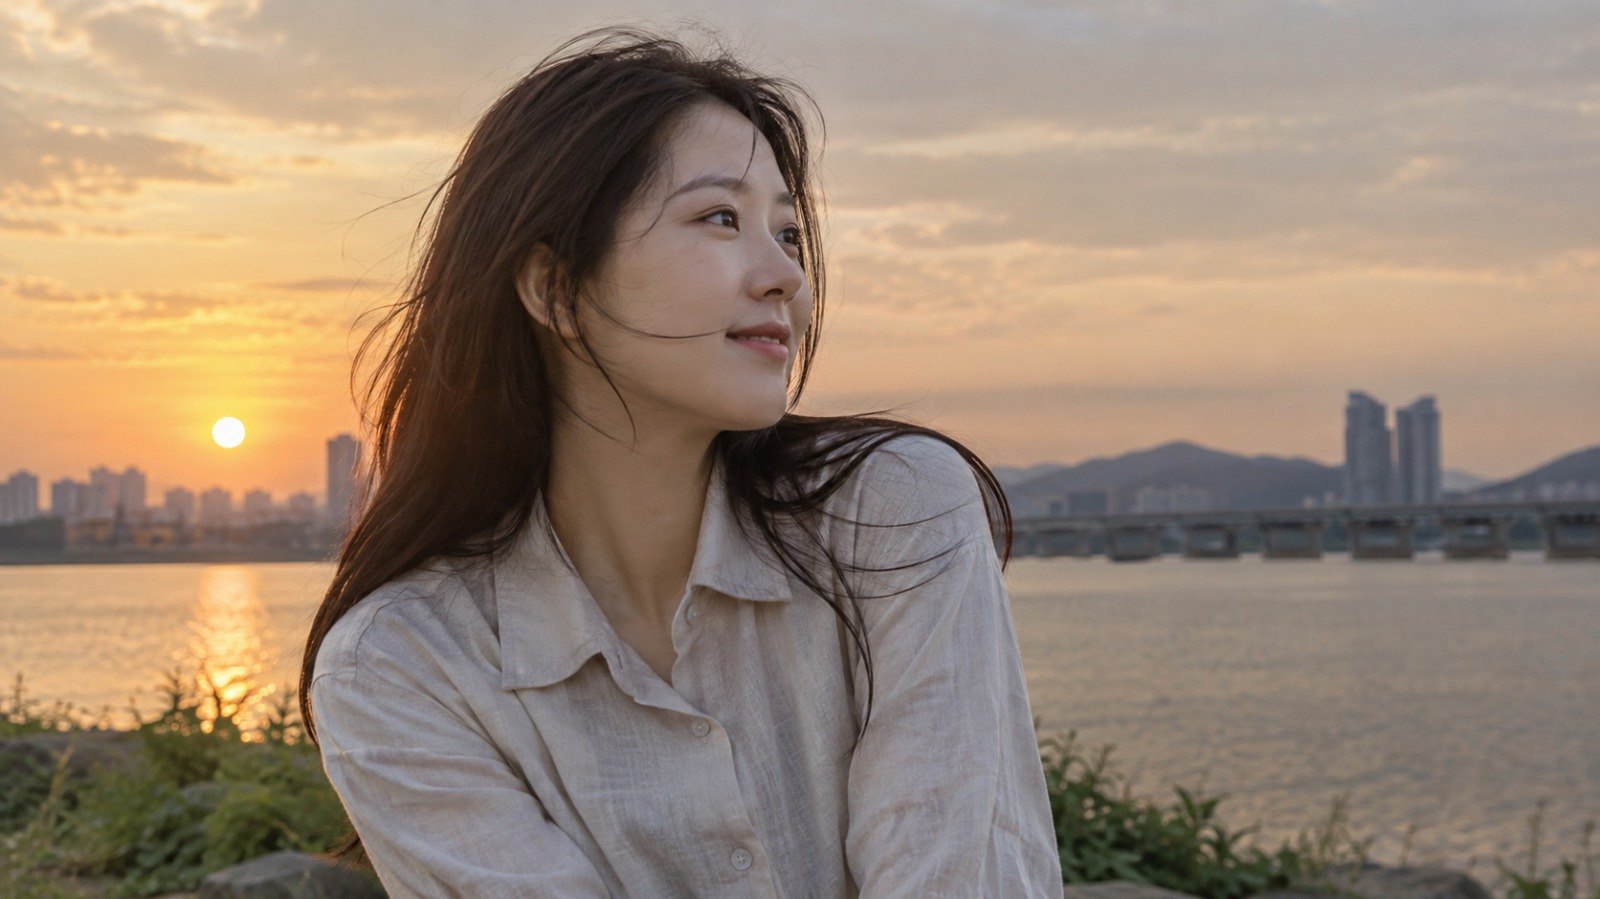
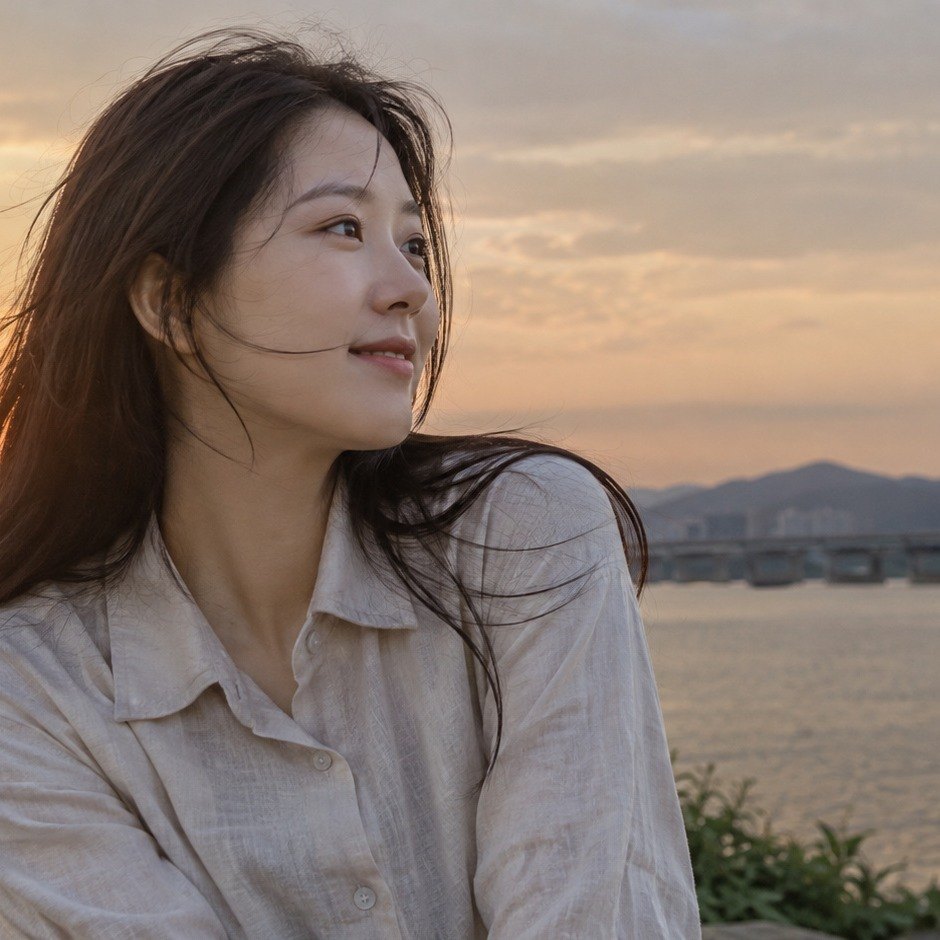
The people in the sample photos were generated by AI.
A 16 : 9 landscape photo becomes a square photo centered on the person.
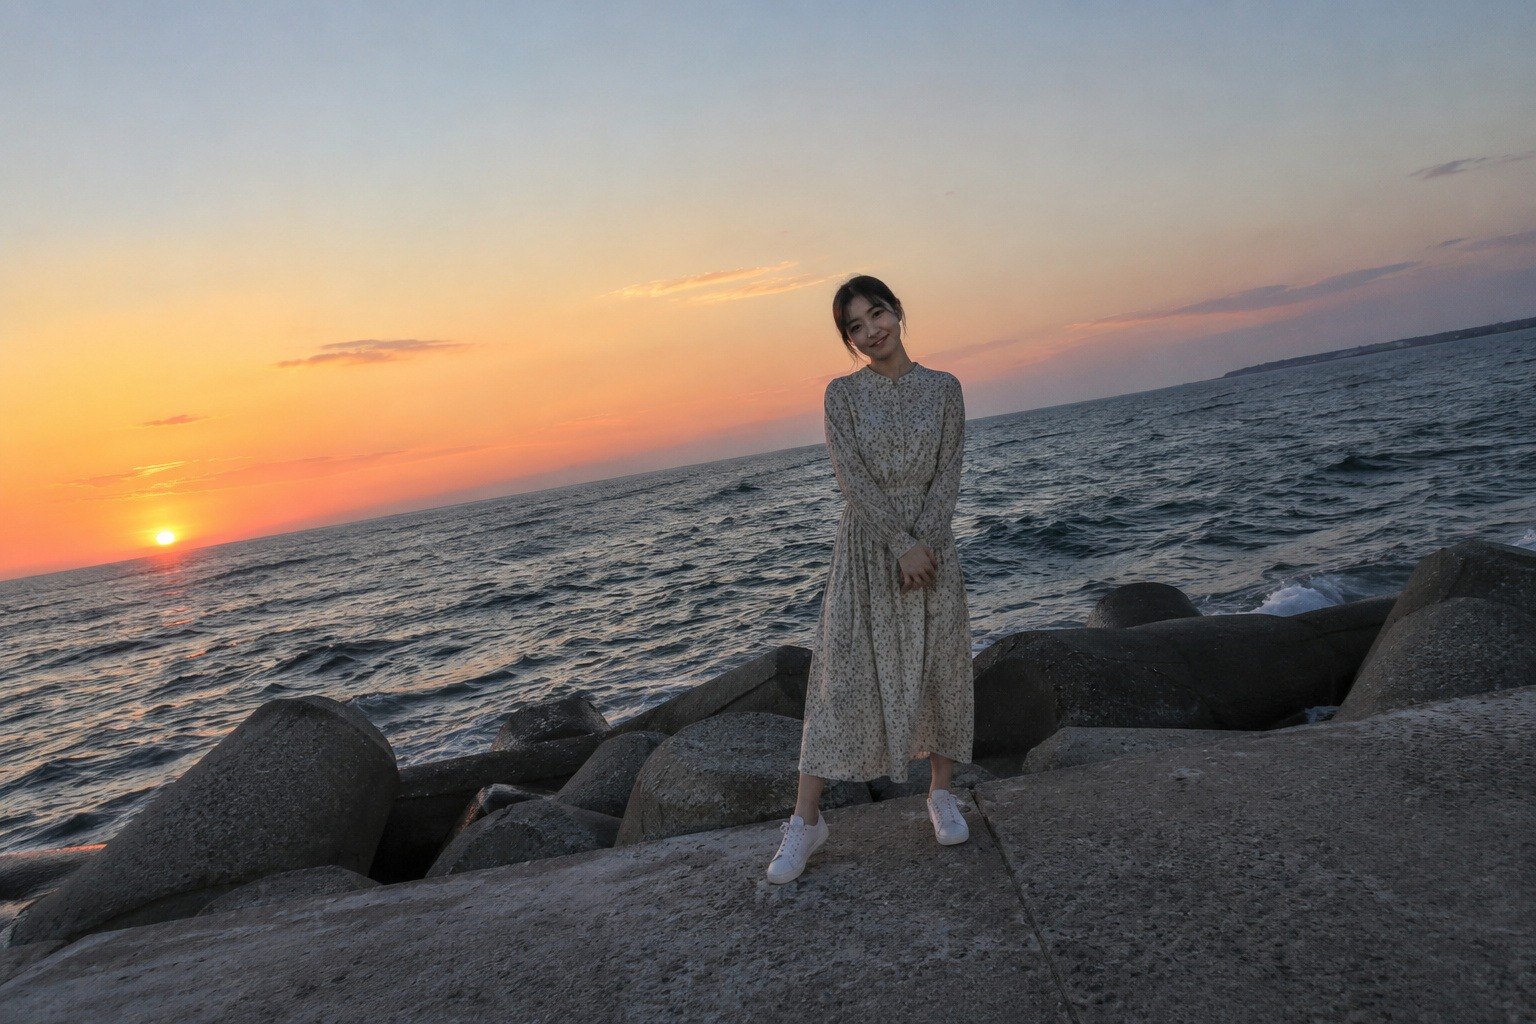
 BeforeAfter
The horizon, which rose to the right, becomes level. The crop frame moves inward slightly so that no empty areas appear in the four corners after rotation.
The people in the sample photos were generated by AI.
Good to know
- The original isn't changed. Crop, rotation and perspective are saved only as edit values, and result files are created through Export. That's why the cropped-away area is visible again when you reopen the Crop tab.
- Rotate 90° in the grid view, the full view and the detail info is the same value. A photo rotated there is already rotated when you open the Crop tab, and you can change it again with Left 90° · Right 90° or undo it with Reset to full frame → Apply. → Viewing and selecting photos
- Rotating or applying perspective crops the edges a little. That's because the photo is enlarged just enough to avoid empty (transparent) corners.
- With perspective applied, the crop view shows how the photo is actually tilted. The whole trapezoid is visible, and parts that fall outside the crop frame look blurred (hidden when Show outside area is off). The larger the perspective value, the smaller the photo is shown so that the parts outside fit on screen.
- Crop mode continues while you drag a Perspective slider. The crop frame, photo size and straightening stay as they are, and the photo keeps the same size after you release the mouse button.
- Perspective is applied to the photo as soon as you move the slider. So it stays even if you click Cancel for the crop. To remove perspective, click Reset perspective or undo it with Ctrl+Z after you finish cropping. Perspective is shown on the photo on the Edit tab and on the other tabs as well.
- Use undo after you finish cropping. Once you end cropping with Apply or Cancel, the undo button at the bottom of the screen and Ctrl+Z are available. To reset only the crop frame to its starting state while cropping, click Reset to full frame.
- A crop frame you haven't applied is handled as follows.
- Clicking another tab (Edit · Masks and so on) → it's discarded.
- Clicking Done in the editor, or moving to another photo in the filmstrip at the bottom → it's applied and saved.
- Clicking Cancel in the editor (top right) → it's discarded along with all the other edits you just made.
- In crop mode, the photo is fitted to the screen. You can see the whole photo and the crop frame at a glance.
- Masks and repair spots are fixed to their original positions in the photo. Even if you crop or rotate later, masks don't end up in the wrong place. → Masks
- Vignette is applied based on the cropped frame. When you crop the photo, the vignette is fitted to the edges of the new frame. → Repair · Effects
- The focus point marker in the full view is also drawn in the right place on cropped or rotated photos. → Full view
- Crop · rotation in Paste edits is off by default. If you turn it on and paste, the crop frame, 90° rotation and straightening are carried over (perspective is set for each photo). On photos with a different aspect ratio, it may land in a different place. → Editor overview
Frequently asked questions
I'm on the Crop tab, but buttons like the ratio list, 90° rotation and Rotate with mouse are dimmed and locked.
That's because you're not in crop mode (after ending it with Esc or applying with Enter). Click the Crop tab once more to enter crop mode again. The Perspective sliders can be moved even outside crop mode, and you enter crop mode when you release the mouse button.
I clicked Cancel for the crop, but the building is still tilted (straightened).
Perspective is applied as soon as you move the slider, so it stays regardless of canceling the crop. Click Reset perspective.
Applying perspective crops a lot of the photo.
That's because the photo is enlarged to avoid empty areas from the tilt. Apply a little less perspective, or move the frame to keep the parts you need. Leaving some room around the edges when you shoot means less gets cropped.
I want to rotate more than 45°.
Straighten goes up to ±45°. For large rotations, first rotate with Left 90° · Right 90°, then adjust the rest with Straighten.
I want to restore a cropped photo to the original.
On the Crop tab, click Reset to full frame → (if you applied perspective) Reset perspective → Apply, in that order. Reset all at the top of the editor removes all edits, including the crop.
I can't see anything outside the crop frame, so I don't know what's being cut off.
Show outside area is off. Turn it on, and the area outside the frame looks dark and blurred.
How is this different from the rotate button in the full view?
It's the same value. 90° rotation in the grid view, the full view and the detail info also leaves the original file untouched and is saved as the same edit value as 90° rotation on this tab. In the full view, each click rotates clockwise and is saved right away; on this tab you can rotate in either direction and need to Apply after rotating. Only for formats that can't be opened in the editor (such as BMP) does rotating in the full view rotate the file itself. → Full view