Tone Curve
Adjust the shadows, midtones and highlights of a photo separately. Drag the line in the box to raise or lower just the range you want, and move the red, green and blue curves individually to add or remove color in each range.
When to use it
- When you want an S-shaped contrast boost: crisp midtones with softer ends.
- When you want a film or matte look with slightly lifted blacks (raise the dark end).
- When you want to pick out and adjust only a specific brightness range (for example, lifting just the tones around skin brightness a little).
- When you want color to vary with brightness, such as warm highlights and cool shadows (red and blue curves).
- When you want to remove a color cast from the shadows or the highlights only, at the brightness where it appears.
Where to find it
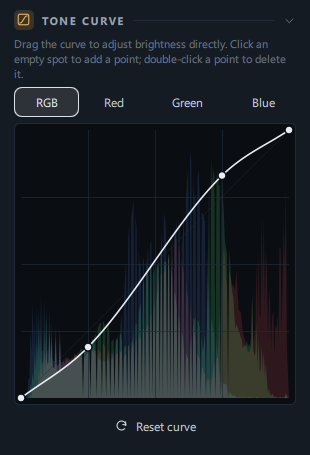
Edit tab → the TONE CURVE panel below the DEEP BLACKS panel (curved-line icon). It starts out collapsed, so click the panel title once to expand it.
Step by step
Add contrast with an S-curve
- Expand the Tone Curve panel
Click the TONE CURVE title. Make sure RGB is selected.
- Place a point on the bright side and raise it a little
Click near the grid line at the upper right of the box (about 75% across) and drag up slightly.
- Place a point on the dark side and lower it a little
Click near the grid line at the lower left (about 25% across) and drag down slightly.
- Check that the line forms an S
Moving just slightly above and below the diagonal is enough. Bending it a lot makes colors heavy and crushes both ends.
- Compare before and after
Press Y (split view).
Create a film or matte look (lifted blacks)
- In RGB, drag the bottom-left endpoint up a little (about 5–10% vertically). The darkest areas become dark gray.
- If it looks too washed out, place a point around 25% across and lower it a little to keep depth in the shadows.
- If you like, lower the top-right endpoint a little to tone down the whites slightly as well.
Warm highlights, cool shadows
- Select Blue.
- Place a point around 25% across and raise it a little — the shadows take on a blue tint.
- Place a point around 75% across and lower it a little — blue drains from the highlights, making them yellower and warmer.
- If needed, do the opposite in Red (raise the bright side a little) to warm the highlights even more.
Move, delete and reset points
- Clicking near a point selects that point.
- Double-click a middle point to delete it. Drag the endpoints back to where they started (the bottom-left and top-right corners).
- To return everything to the starting state, click Reset curve. To reset just one curve, double-click the middle points on that channel to delete them and move the endpoints back to the corners.
Result
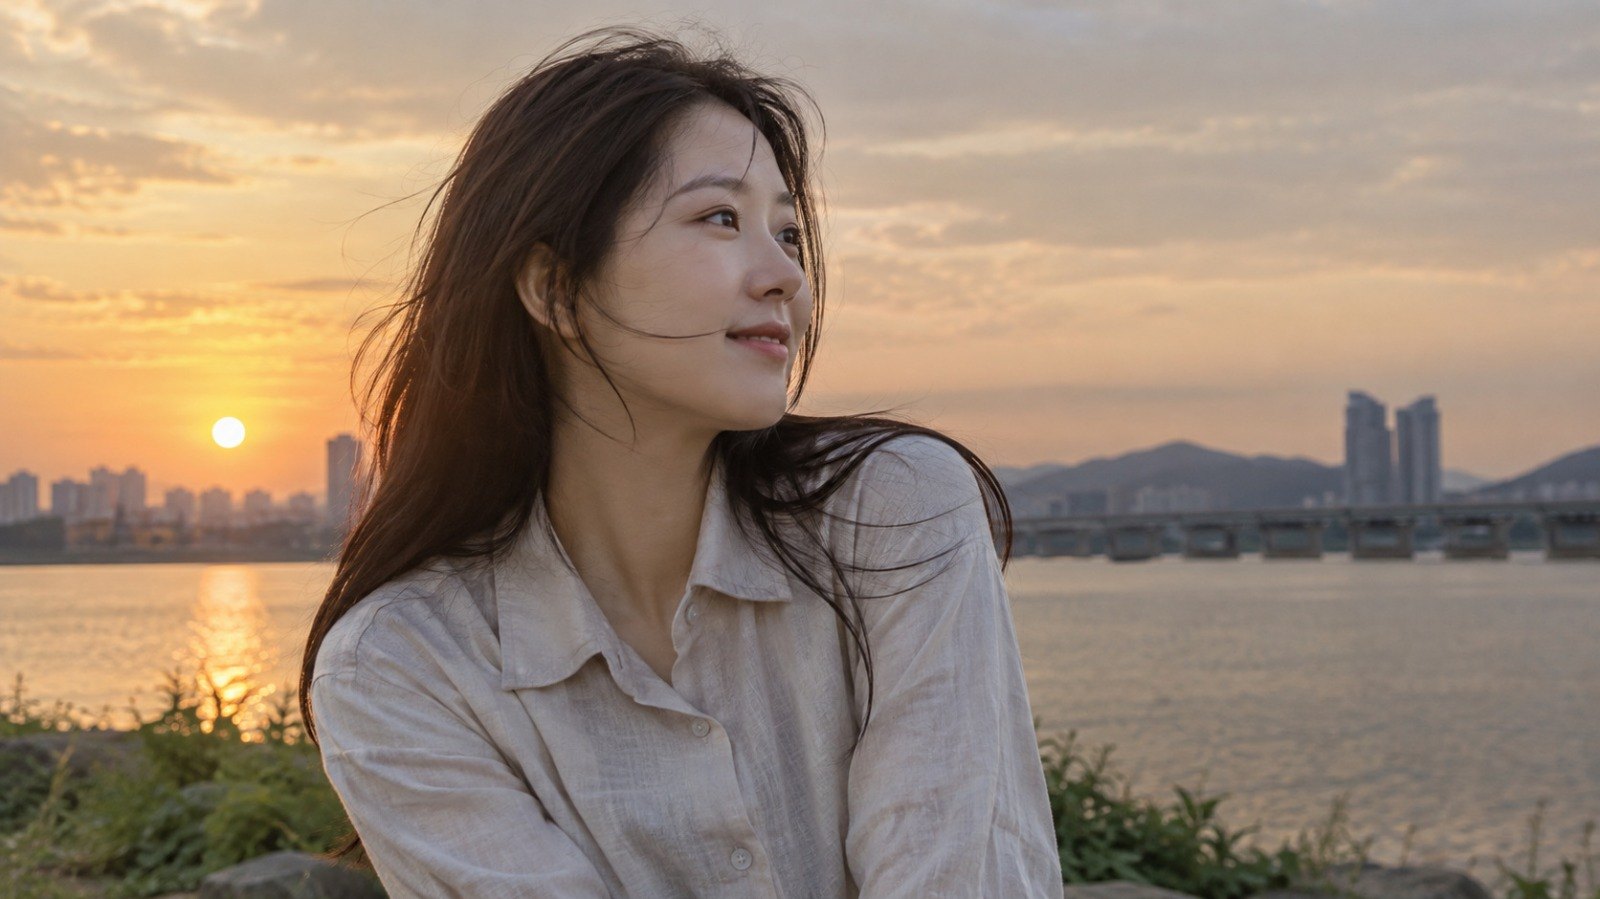
 BeforeAfter
The flat sunset photo gains clear contrast, and the texture of the sky and hair comes to life.
The people in the sample photos were generated by AI.
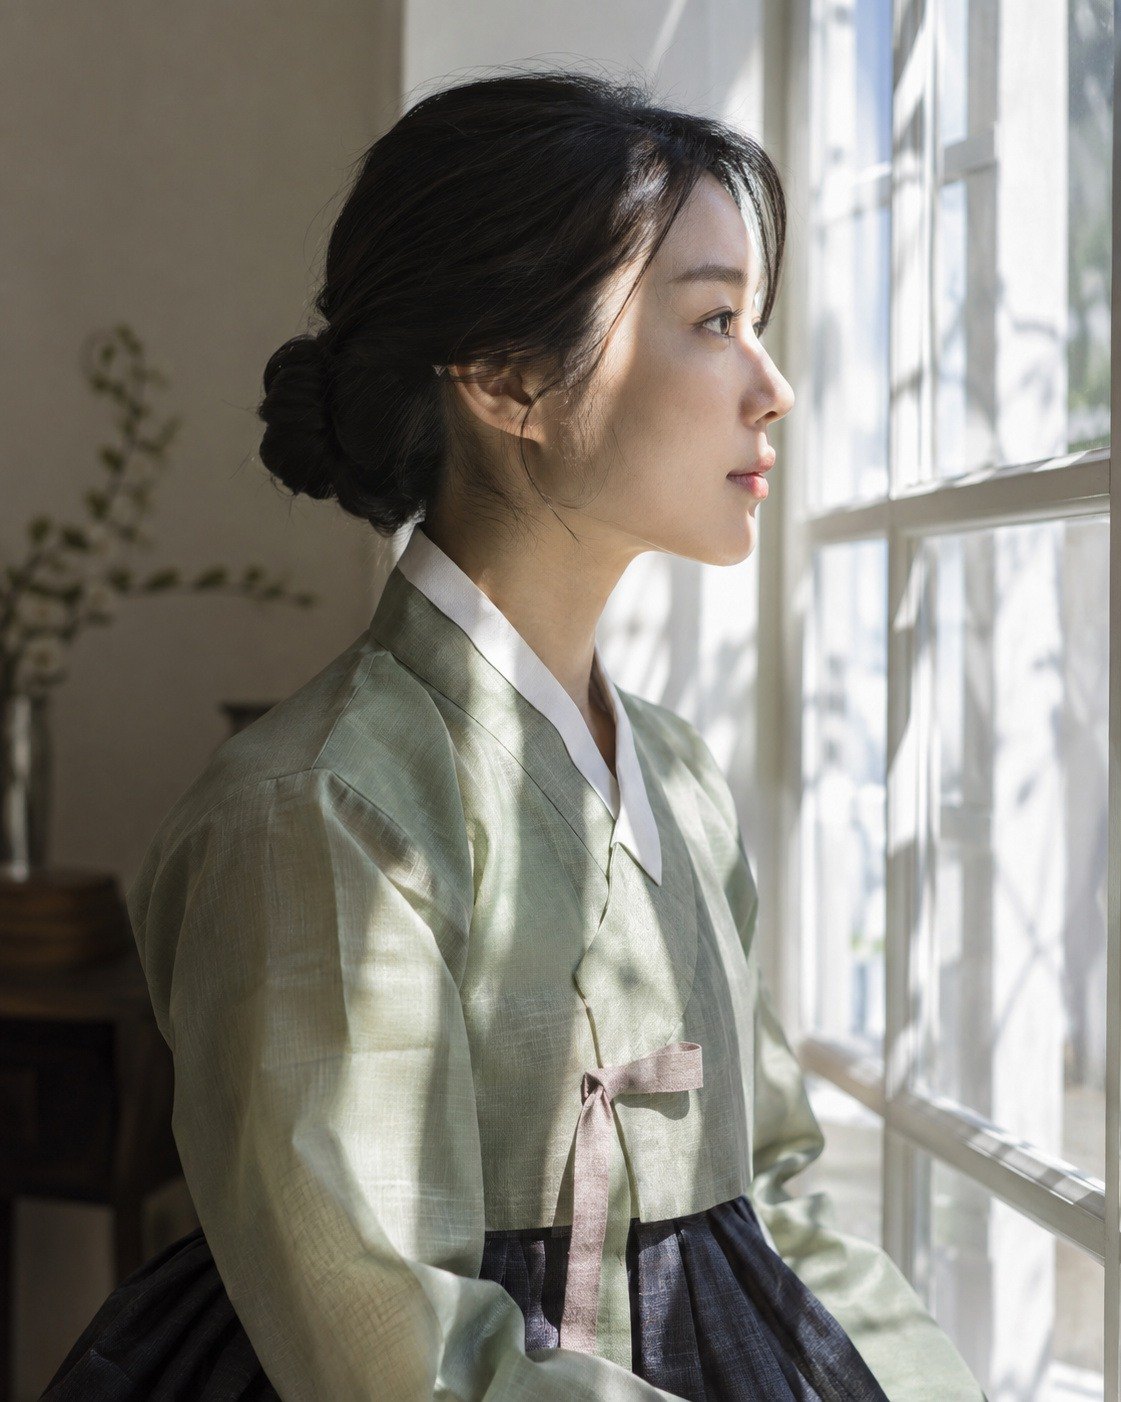
 BeforeAfter
The face lit by the window light turns warm, while the shaded background turns blue.
The people in the sample photos were generated by AI.
Good to know
Moving the curve by just a few pixels changes the result a lot. Start by moving only very slightly away from the diagonal.
The faint shape in the box background is this photo's brightness distribution. A point placed where the graph is high changes a large part of the photo; a point placed where it's empty changes almost nothing.
For overall brightness, the Exposure slider is easier to handle, and for simple contrast, the Contrast slider. The curve works best as a finishing step after that.
Pull blacks lifted by a LUT (look) back down with the Deep Blacks panel.
To reset just one, see "Move, delete and reset points" above. If you clicked it by mistake, press Ctrl+Z.
Curves are carried over with Copy edits rather than presets. If you choose "Light" when pasting, the curves are copied too.
- Add a new point by clicking a little away from its neighbors horizontally.
Frequently asked questions
I can't add a point.
Each curve can have up to 16 points. Also, clicking right next to an existing point (at almost the same horizontal position) selects that point. Click a little farther away.
I want to move an endpoint sideways.
The endpoints always stay at the left and right edges of the box and move only up and down. For tasks like "pulling the darkest areas down to black", Blacks or the Deep Blacks panel is the right tool.
What happens if I use the RGB curve together with the red, green and blue curves?
The color curves are applied first, and the RGB curve is applied on top of them. You can adjust both.
I changed the curve, but the numbers in the Light panel stayed the same.
That's normal. The curve is saved separately from the slider values, and both are applied together when the photo is edited.
Can I apply a curve to a masked area only?
The curve applies to the whole photo. To change just part of it, use the light sliders in Masks.