Export
Save an edited photo as a new file (JPEG · PNG · TIFF). The original stays as it is, and you set the format, color space, quality, size, save location and which metadata (EXIF) to include, all in one window. When saving finishes, click the "Saved: …" message in the status bar at the bottom to open the folder containing the saved file right away.
When to use it
- When you've finished editing a photo and want a file to post on messaging apps, social media or a blog (reduced to a long edge of 2048, 1080 and so on).
- When you need a full-size, top-quality file for printing.
- When you want to leave out the shooting location (GPS) and camera serial numbers from photos you'll post online (they're left out by default).
- When you want to put an artist name or a copyright notice in the photo file.
- When you want to turn a RAW photo into a JPEG that opens in any program.
- When you're handing a lossless TIFF file to a print shop or another editing program.
Where to find it

Click the Export button on the right side of the top bar in the Edit screen (between Reset all and Full screen) to open the Export photo window.
- Open the editor with the Edit button in the full view. You can also open it with Edit in the right-click menu of the full view → Editor overview.
- You export from the editor.
- What gets exported is the single photo currently open in the editor.
- The Export button is sometimes disabled: in crop mode, while drawing a mask, while previewing a preset, while using a tool that picks a color from the photo, or while already saving. Apply that action or end it with Esc, and the button becomes active again.
Settings
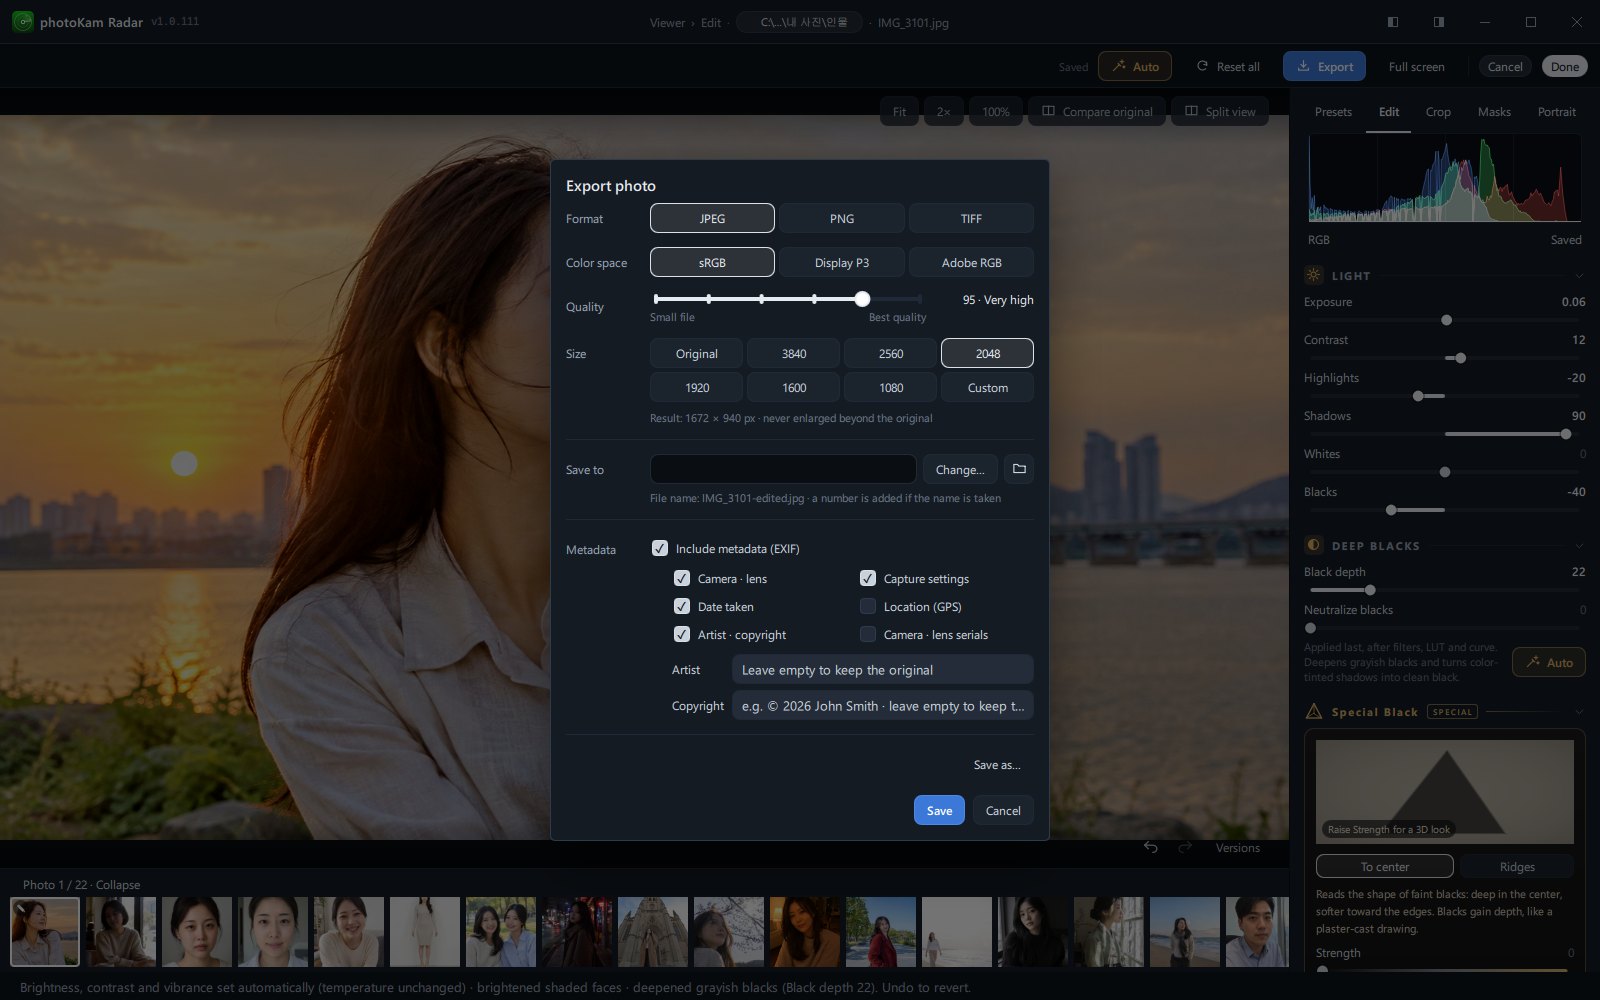
| Name | Options | Default | Description |
|---|---|---|---|
| Format | JPEG · PNG · TIFF | JPEG | The file format to save (the same on Windows and macOS) |
| Color space | sRGB · Display P3 · Adobe RGB | sRGB | The range of colors stored in the file |
| Quality | 60 Small file · 70 Normal · 80 Good · 90 High · 95 Very high · 100 Maximum | 95 · Very high | JPEG image quality and file size (shown only for JPEG) |
| Size | Original · 3840 · 2560 · 2048 · 1920 · 1600 · 1080 · Custom | Original | The number of pixels on the long edge |
| Save to | Folder path · Change… · folder button | The folder of the edited photo | The folder to save the file in |
| Metadata | Include metadata (EXIF) + 6 detailed items | Included, with only location and serials off | The shooting information to include in the file |
| Artist · copyright | Two text fields | Empty (the original's values) | The name and copyright notice to put in the file |
| Save as… | — | — | Save with a name and folder you choose |
| Save · Cancel | — | — | Save straight to the save location / close the window |
All your choices are remembered. The next time you open the export window, your previous settings are still there.
Format
- JPEG — Opens on almost any device, program and website. Control the file size with Quality. The extension is
.jpg. - PNG — A lossless format. For the same photo, the file is much larger than a JPEG. The extension is
.png. - TIFF — Saves with lossless compression and includes the chosen color space information (profile) in the file. Good for handing to a print shop or another editing program. The extension is
.tif. Metadata (EXIF) goes into JPEG and PNG files, so if you need shooting information, choose JPEG or PNG.
Color space
- sRGB — The standard for the web, social media, most monitors and photo printing. If you're not sure, choose this.
- Display P3 — Good for photos that will be viewed on wide-gamut screens (recent phones, some monitors).
- Adobe RGB — Choose this when a print shop or print lab asks for this color space.
- The editor displays in sRGB and converts to the chosen color space when saving. If you choose a color space other than sRGB, a line at the bottom of the window says so.
Quality
- Shown only for JPEG. Drag the slider to choose one of six levels. The number and name, such as
95 · Very high, appear on the right, and the two ends below the slider are labeled "Small file" and "Best quality". - The higher the number, the better the quality and the larger the file. For photos you'll post online, 80–90 is about right; for archiving or printing, 95–100.
Size
- It's based on the long edge. For a landscape photo the width, and for a portrait photo the height, becomes the chosen value, and the aspect ratio is kept.
- Original saves the photo at its full size. If you cropped the photo, it's the cropped size.
- Click Custom to show the Long edge field. Enter a value between 64 and 65535 px (the default is 3000).
- The actual resulting size is previewed below the buttons. For example:
Result: 2048 × 1365 px · never enlarged beyond the original. - If the photo is smaller than the chosen value, it isn't enlarged and is saved at its original size.
Save location and file name
- The field shows the current save folder. Long paths are shortened in the middle; hover over it to see the full path.
- If you've never changed it, files are saved in the folder that contains the edited photo.
- Click Change… and choose a folder in the Choose a save folder window, and that folder is remembered so the next photos are saved there too.
- Click the folder-shaped button next to it (Open save folder) to open the save folder in File Explorer (Finder on macOS).
- The file name is the original name +
-edited. The window previews it, for example:File name: IMG_1234-edited.jpg · a number is added if the name is taken. - If a file with the same name already exists, it isn't overwritten; a number is added instead, as in
IMG_1234-edited-2.jpg,IMG_1234-edited-3.jpg…. - The original file is never overwritten.
Save as
- Click Save as… at the bottom right of the window, and the export window closes and the Save as a new file window opens. Choose the folder and file name yourself there.
- The format, color space, quality, size and metadata settings you chose in the export window are used as they are.
- Even if you type a different extension (for example,
a.pngwhen the format is JPEG), the file is saved with the extension of the chosen format (a.jpg). - If you specify a file name that already exists, it isn't overwritten. The status bar shows "Export failed: Existing files are never overwritten. Choose a different name."
- If you specify the original file, "Can't save over the original file. Choose a different name." appears and nothing is saved.
- The folder you choose here becomes the Save to location from then on.
Metadata (EXIF)
Choose which of the shooting information the camera recorded in the photo file to include in the exported file.
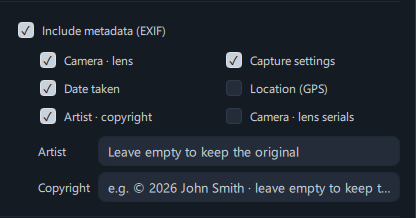
| Item | Default | Information included |
|---|---|---|
| Camera · lens | On | Camera make · model, lens |
| Capture settings | On | Aperture · shutter speed · ISO · focal length · exposure compensation · metering mode · flash · white balance (hover to see this list), shooting mode |
| Date taken | On | Date and time taken (with the time zone, if recorded) |
| Location (GPS) | Off | Latitude · longitude · altitude |
| Artist · copyright | On | Artist name · copyright notice (see "Artist · copyright" below) |
| Camera · lens serials | Off | Serial numbers of the camera body and lens |
- When you turn off Include metadata (EXIF), all the detailed items disappear and the notice "No metadata at all — camera, date, location and so on are left out." appears. In that case no information at all is included, not even the program name.
- When it's on, the selected items are included along with the image size (width · height in pixels), color space information and the program name (photoKam Radar).
- Turning on location shows "Location is included — turn it off for photos you'll post online." in a warning color. Location and serial numbers can reveal where you live or what equipment you own, so they're off by default.
- Information that isn't in the original isn't included even if the item is on (for example, a photo without location data).
- When you export a RAW photo, the original's information is read and included too.
- Crop and rotation are already applied to the image, so the file's orientation is recorded as "normal". The photo won't be rotated a second time when opened in other programs.
- Metadata goes into JPEG and PNG files. When you choose TIFF, "Metadata can't be included when exporting to TIFF (JPEG and PNG only)." appears.
Artist · copyright
- When the Artist · copyright item is on, two fields — Artist · Copyright — appear below it.
- If left empty, the values recorded in the original photo (such as a name you registered in your camera) are included as they are. If the original has none either, nothing is included.
- If you type something, what you typed is included instead of the original's values. For example:
© 2026 John Smith. - What you type is remembered and used for the next export too.
Free version notice
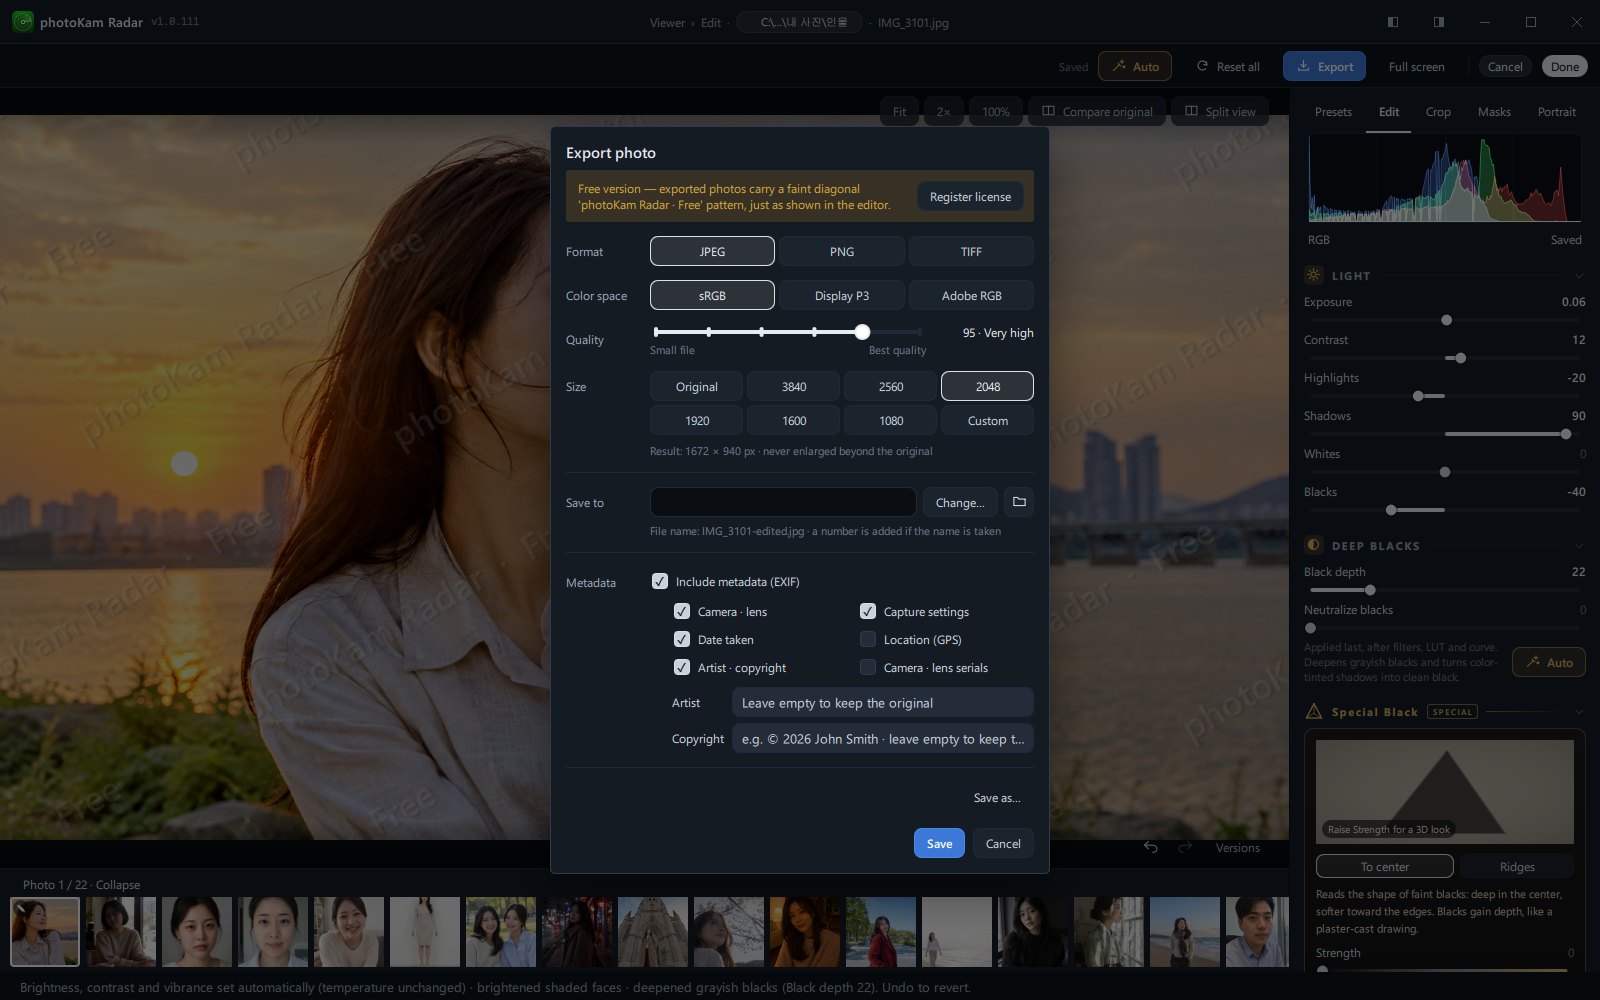
- In the free version, without a registered license, a notice appears at the top of the window: "Free version — exported photos carry a faint diagonal 'photoKam Radar · Free' pattern, just as shown in the editor."
- Click Register license to the right of the notice, and the export window closes and the license window opens → Free version · Full version · License registration.
- The watermark is applied faintly and diagonally across the whole photo. Its size is set relative to the photo's long edge, so it keeps the same proportion even in small exports, and it can't be avoided by cropping.
- The full version has no watermark. Apart from the watermark, export works the same in the free and full versions.
While saving · after saving (status bar)
- When you click Save, the window closes and the Export button at the top changes to Saving…. The status bar at the bottom shows
Exporting as JPG: IMG_1234-edited.jpg, a progress bar (1 / 1) and a Cancel button. - Use Cancel · Done in the editor once saving has finished ("Exporting — you can close once it's done").
- When saving finishes, the status bar shows
Saved: D:\Photos\Export\IMG_1234-edited.jpgwith a folder icon. Depending on the metadata settings,· location included,· without metadataor· without metadata (TIFF)is added at the end. - Click this message to open the folder it was saved to, with the file you just saved selected (File Explorer on Windows, Finder on macOS). When you hover over it, the message is underlined and the tooltip "Click to open the folder it was saved to" appears. If you've moved the file in the meantime, only the folder opens.
- If saving fails, "Export failed: (reason)" appears along with a Failures button. Click it to see the file name and the reason in the Export failures window.
- If the save folder can't be written to (a disconnected external drive, a write-protected folder), "Can't write to the save folder: (folder)" appears.
- If you click Cancel while saving, "Export cancelled." appears and no file is created.
Step by step
- Finish editing
Click Edit in the full view and make your adjustments. Edit values are saved automatically, so there's no need to save them separately.
- Click Export
It's on the right side of the editor's top bar. The Export photo window opens.
- Choose the format and color space
In most cases, just leave them at JPEG · sRGB.
- Choose the quality and size
For photos you'll post online, set the quality slider to around
90 · Highand the size to 2048 or 1080. For printing, set the quality to95 · Very highor above and the size to Original. Check the actual size in "Result: … px" below the buttons. - Check the save location
To collect the files somewhere else, choose a folder with Change…. Once you choose it, files are saved to that folder next time too.
- Choose the metadata
For photos you'll post online, check that Location (GPS) is off. To add your name, type it in the Artist · Copyright fields.
- Click Save
A progress bar appears in the status bar at the bottom, and when it's done, "Saved: …" appears.
- Click "Saved: …" in the status bar
The folder it was saved to opens with the new file selected.
Common setting combinations:
| Purpose | Format | Color space | Quality | Size | Metadata |
|---|---|---|---|---|---|
| Social media · messaging | JPEG | sRGB | 90 High | 2048 or 1080 | Default (location off) |
| Printing · archiving | JPEG | sRGB | 95–100 | Original | Default |
| Print shop request | The format the print shop specifies | Adobe RGB (when requested) | 100 Maximum | Original | Default |
| Sharing without information | JPEG | sRGB | 90 High | Any size | Include metadata (EXIF) off |
Result
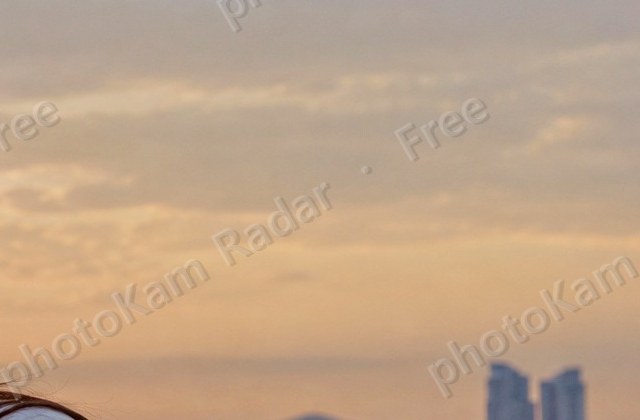
A new file with -edited added to the original name appears in the save folder (for example, a 6000 × 4000 photo exported at 2048 becomes 2048 × 1365). The original file isn't changed at all, and the edit values stay as they are, so you can export again with different settings any time.
Good to know
The export window remembers your last settings. If you always use the same settings, just click Export → Save — two clicks.
Sharpening, noise reduction and texture are applied at the pixel level, so their strength can look different in Fit view and in the exported file. Check in the editor's 100% view before exporting → Detail.
Photos with AI denoise turned on are recomputed at the original resolution, so saving can take a while (several tens of seconds or more, depending on your computer). Please wait until saving finishes.
If you save to the original's folder (the default), the exported file is inside your photo folder too, so it may appear in the gallery as a new photo. To keep exports separate, choose another folder with Change….
The watermark on files exported with the free version can't be removed later. After registering a license, export the same photo again to create a file without the watermark (your edit values are still there).
Display P3 or Adobe RGB files may look washed out in programs without color management and on some websites. For photos you'll post online, sRGB is the safe choice.
Exported files are never overwritten. If you export the same photo several times, -edited-2, -edited-3 … files keep piling up.
The "Saved" message in the status bar is replaced by the notice of any other action you take (such as pasting edits). After that, open the save folder with the folder button in the export window.
When you choose TIFF, "TIFF files don't include metadata (EXIF)." appears at the very bottom of the window. PNG files do include metadata.
Frequently asked questions
I don't know where the exported file went.
Right after saving, click "Saved: …" in the status bar. If some time has passed, the folder shown under Save to in the export window is the save folder, and you can open it with the folder button next to it. If you've never changed it, it's the folder that contains the original photo.
Do my edit values disappear when I export?
No. The edit values stay as they are, so you can export again as many times as you like with a different size or format.
Can I export several photos at once?
You export the photo open in the editor one at a time. Apply the same edits to several photos with Ctrl+Shift+C · Ctrl+Shift+V (copy and paste edits), then go through the photos in the filmstrip at the bottom of the editor and export them one by one.
The exported photo has no date taken.
Check that Include metadata (EXIF) and Date taken are on. It isn't included if you exported to TIFF or if the original has no date.
Is location information included?
Not with the default settings. It's included only when you turn on Location (GPS), and then " · location included" is added in the status bar.
Can I convert a RAW file to JPEG?
Yes. Open the RAW photo in the editor (no edits needed), choose JPEG as the format and export it. The shooting information is included too.
Can I export in the free version?
Yes, with all the same settings. However, a faint diagonal watermark is applied across the whole exported photo.